This content originally appeared on DEV Community and was authored by Karl Esi
Now, let’s see how we can use CSS to improve the look and feel of this page.
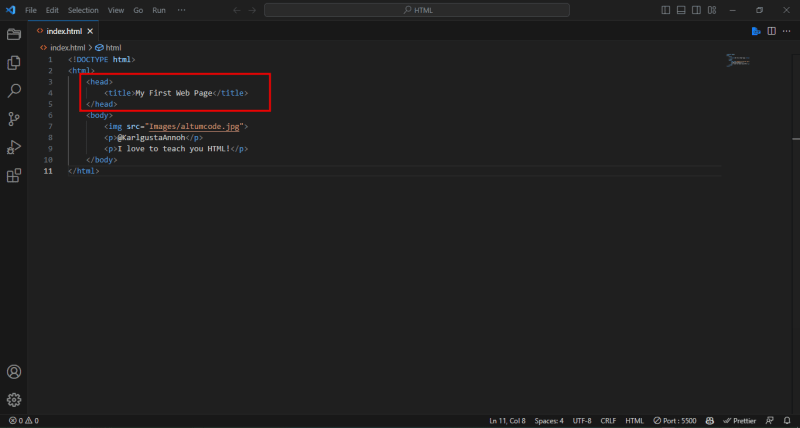
Look at our head element:
<head>
    <title>My First Web Page</title>
</head>
Currently, we have a single element inside the head element. That is our title element.
Now, after the title, we are going to add another element called style. This is where we are going to write our CSS code.
So, in between style tags, we are going to write a bunch of CSS rules.
<!DOCTYPE html>
<html>
    <head>
        <title>My First Web Page</title>
    </head>
    <body>
        <img src="Images/altumcode.jpg">
        <p>@KarlgustaAnnoh</p>
        <p>I love to teach you HTML!</p>
    </body>
</html>
First, we are going to work on this image. Our image is currently too big.
So, let’s make it a bit smaller.
Back to VS Code. Inside the style tags, we are going to type the following:
<style>
    img {

    }
</style>
img references our image element. Then we type a pair of curly braces {} and inside those we write one or more CSS declarations. Each declaration contains a property and a value.
Here we can set the width property to, let’s say, 100px.
<style>
    img {
        width: 100px;
    }
</style>
So, we type the property, add a semicolon, and then the value. Then we terminate this line using a semicolon so that we can write multiple CSS declarations.
width: 100px;
Here is how it looks on VS Code:
<!DOCTYPE html>
<html>
    <head>
        <title>My First Web Page</title>
        <style>
            img {
                width: 100px;
            }
        </style>
    </head>
    <body>
        <img src="Images/altumcode.jpg">
        <p>@KarlgustaAnnoh</p>
        <p>I love to teach you HTML!</p>
    </body>
<html>
Now, let’s save the changes.
Back in the browser, our image looks smaller. It’s a lot better.
But look at the edges. The edges are so sharp. I would like to make them a bit round so they appear softer.
Back to our rule – here we are going to set the border-radius to 10px.
<style>
    img {
        width: 100px;
        border-radius: 10px;
    }
</style>
Don’t worry about memorizing any of these properties. We are going to go over them several times throughout the tutorial. In this section, I just want you to get a sense of what it is like to use CSS.
<!DOCTYPE html>
<html>
    <head>
        <title>My First Web Page</title>
        <style>
            img {
                width: 100px;
                border-radius: 10px;
            }
        </style>
    </head>
    <body>
        <img src="Images/altumcode.jpg">
        <p>@KarlgustaAnnoh</p>
        <p>I love to teach you HTML!</p>
    </body>
</html>
Now save the changes.
Look – the edges are round and look softer. Now, let me show you a trick.
<!DOCTYPE html>
<html>
    <head>
        <title>My First Web Page</title>
        <style>
            img {
                width: 100px;
                border-radius: 50px;
            }
        </style>
    </head>
    <body>
        <img src="Images/altumcode.jpg">
        <p>@KarlgustaAnnoh</p>
        <p>I love to teach you HTML!</p>
    </body>
</html>
If it is with border-radius, to add a value that is half of the width, we will get a round image. So, I am going to set the border-radius to 50px which is half of our width.
<style>
    img {
        width: 100px;
        border-radius: 50px;
    }
</style>
This is how it looks in VS Code:
<!DOCTYPE html>
<html>
    <head>
        <title>My First Web Page</title>
        <style>
            img {
                width: 100px;
                border-radius: 50px;
            }
        </style>
    </head>
    <body>
        <img src="Images/altumcode.jpg">
        <p>@KarlgustaAnnoh</p>
        <p>I love to teach you HTML!</p>
    </body>
</html>
And here is the result:
That’s a lot better.
Now our elements are stacked vertically. But I want the image to be pushed to the left side.
So, let’s set the float property to left.
<style>
    img {
        width: 100px;
        border-radius: 50px;
        float: left;
    }
</style>
This will push the image element to the left side of our text elements. Take a look:
That’s a lot better, but our image is so close to the text. I want to add some space after the image. Here we’ll use another property called margin-right. We can set it to 10px.
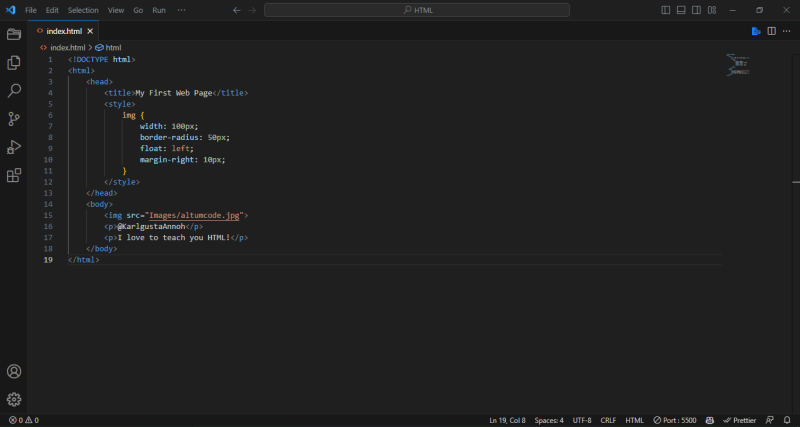
<style>
    img {
        width: 100px;
        border-radius: 50px;
        float: left;
        margin-right: 10px;
    }
</style>
Here is how it looks on VS Code:
<!DOCTYPE html>
<html>
    <head>
        <title>My First Web Page</title>
        <style>
            img {
                width: 100px;
                border-radius: 50px;
                float: left;
                margin-right: 10px;
            }
        </style>
    </head>
    <body>
        <img src="Images/altumcode.jpg">
        <p>@KarlgustaAnnoh</p>
        <p>I love to teach you HTML!</p>
    </body>
</html>
Save the changes.
That’s a lot better. Now, let’s make the username bold. We are going to repeat this process one more time.
This time, we are going to apply a rule to our paragraph element. Set the font-weight property to bold.
<style>
    img {
        width: 100px;
        border-radius: 50px;
        float: left;
        margin-right: 10px;
    }

    p {
        font-weight: bold;
    }
</style>
Here is the code in VS Code:
<!DOCTYPE html>
<html>
    <head>
        <title>My First Web Page</title>
        <style>
            img {
                width: 100px;
                border-radius: 50px;
                float:left;
                margin-right: 10px;
            }

            p {
                font-weight: bold;
            }
        </style>
    </head>
    <body>
        <img src="Images/altumcode.jpg">
        <p>@KarlgustaAnnoh</p>
        <p>I love to teach you HTML!</p>
    </body>
<html>
Take a look.
See what happened? Both of our text elements are bold. But, what if you want to apply this style only to the username?
Well, we have to separate these two paragraph elements.
<body>
    <p>@KarlgustaAnnoh</p>
    <p>I love to teach you HTML!</p>
</body>
So, I am going to give the first element an attribute called class like this:
<body>
    <p class="">@KarlgustaAnnoh</p>
    <p>I love to teach you HTML!</p>
</body>
Class is short for classification, and we can use this attribute to put this element inside a different class or a different category. Just like the products in a supermarket.
In a supermarket, we have products in different categories, right?
So, I am going to put this paragraph element inside a class or inside a category called username:
<body>
    <p class="username">@KarlgustaAnnoh</p>
    <p>I love to teach you HTML!</p>
</body>
And then I am going to change this rule:
<style>
    p {
        font-weight: bold;
    }
</style>
which is currently applied to all paragraph elements – but I want it to be applied only to paragraph elements with a username class.
So, right after p we type p.username:
    p.username {
        font-weight: bold;
    }
Now, we can also remove p and this rule will apply to all elements that have the username class, whether they are paragraph elements or other types of elements.
    .username {
        font-weight: bold;
    }
Now, save the changes.
This is how it looks on VS Code:
<!DOCTYPE html>
<html>
    <head>
        <title>My First Web Page</title>
        <style>
            img{
                width: 100px;
                border-radius: 50px;
                float: left;
                margin-right: 10px;
            }

            .username{
                font-weight: bold;
            }
        </style>
    </head>
    <body>
        <img src="Images/altumcode.jpg">
        <p class="username">@KarlgustaAnnoh</p>
        <p>I love to teach you HTML!</p>
    </body>
</html>
Now, take a look.
That’s a lot better.
This is CSS in action. As you can see, CSS has a different syntax than HTML.
Throughout the rest of the tutorial, you are going to learn these languages in detail.
Next, I am going to show you how to format your code using Prettier.
See you on the next one!
P.S.  Ready to kickstart your career in web development? Join our course to master HTML, CSS, JavaScript, React, and more! Build real-world projects, learn from industry experts, and connect with a supportive community. Enroll now!
This content originally appeared on DEV Community and was authored by Karl Esi


