This content originally appeared on Telerik Blogs and was authored by Dave Brock
This post shows how to create a dashboard and integrate it with .NET Aspire.
This is the second part of a five-part exploratory series on .NET Aspire.
- Part 1: What Is .NET Aspire?
- This post (part 2): Exploring the Developer Dashboard
- Part 3: Smart Defaults and Integrations
- Part 4: Orchestration and Service Discovery
- Part 5: Deployment Using Azure Container Apps
Hello again, friends, and welcome back. If you missed the intro to about .NET Aspire, feel free to check that out before reading the rest of this piece. Today, we’ll focus on my favorite feature: the developer dashboard. The dashboard allows you to track your app in real-time through a single user interface.
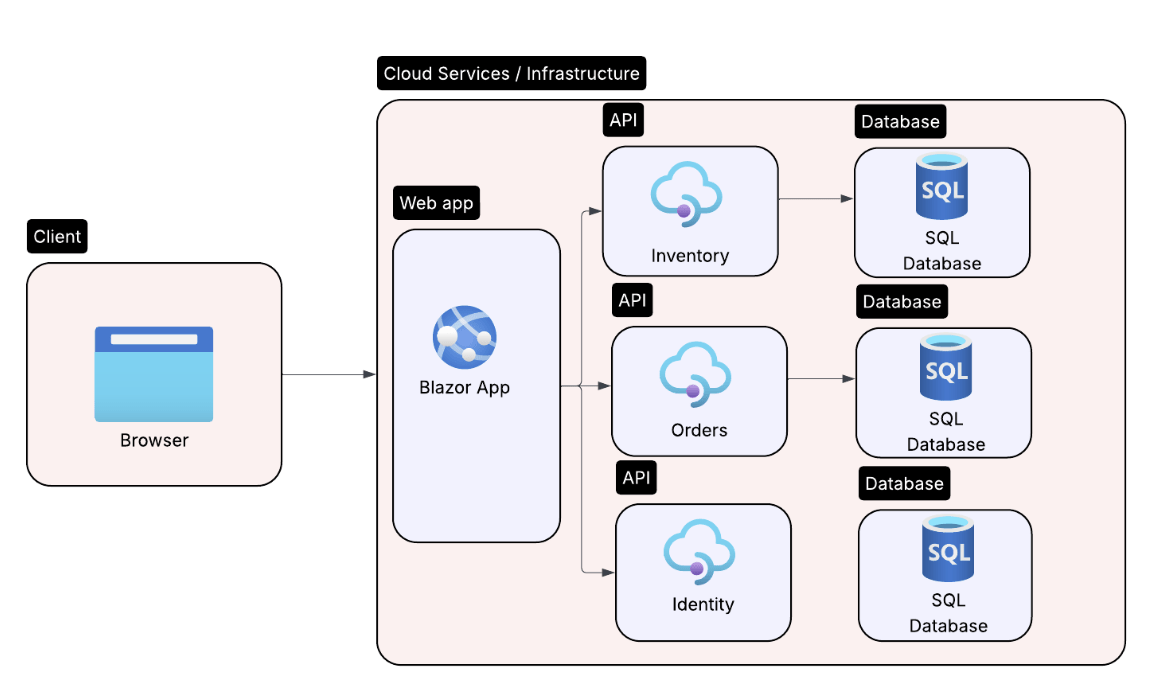
Before we get there, I want to first walk you through the project we’ll be using: Dave’s Guitar Shop. If you remember, here’s the initial high-level architecture of my Aspire-less solution.
Exploring the Project
For this post, we’ll be focusing on the /inventory API. This API is consumed by a Blazor server-side web app. I’ll walk you through key parts of the solution.
The API Code
We are using a quick ASP.NET Core Minimal API with basic CRUD (create, read, update, delete) operations. The data is persisted to a containerized SQL server and uses Entity Framework for query-ability.
Here’s a sample of the API calls:
app.MapGet("/guitars", async (GuitarStoreContext db) =>
{
    var list = await Queries.GetAllGuitars(db).ToListAsync();
    return Results.Ok(list);
});

app.MapGet("/guitars/{id:guid}", async (Guid id, GuitarStoreContext db) =>
    await Queries.GetGuitarById(db, id) is { } dto
        ? Results.Ok(dto)
        : Results.NotFound());

app.MapPost("/guitars", async (Guitar guitar, GuitarStoreContext db) =>
{
    db.Guitars.Add(guitar);
    await db.SaveChangesAsync();
    return Results.Created($"/guitars/{guitar.Id}", guitar);
});

app.MapPut("/guitars/{id:guid}", async (Guid id, Guitar updated, GuitarStoreContext db) =>
{
    var guitar = await db.Guitars.FindAsync(id);
    if (guitar is null) return Results.NotFound();

    db.Entry(guitar).CurrentValues.SetValues(updated);
    await db.SaveChangesAsync();
    return Results.NoContent();
});

app.MapDelete("/guitars/{id:guid}", async (Guid id, GuitarStoreContext db) =>
{
    var guitar = await db.Guitars.FindAsync(id);
    if (guitar is null) return Results.NotFound();

    db.Guitars.Remove(guitar);
    await db.SaveChangesAsync();
    return Results.NoContent();
});
The Database
From the SQL side, my Dockerfile is using the mcr.microsoft.com/mssql/server:2022-latest image. If you’re interested in learning more, check out the Microsoft documentation. Right now, I’m using Docker Compose to manage the container.
In the next post, we’ll discuss how to simplify this with .NET Aspire.
The Blazor App
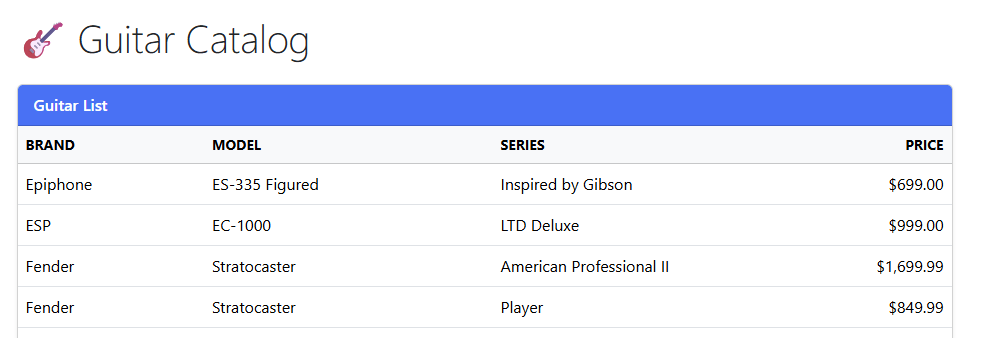
Finally, this API is consumed by a Blazor web app. For now, we’ll show the main component where we load all the guitars in inventory.
@page "/"
@inject BackendHttpClient HttpClient

<PageTitle>Guitars</PageTitle>

<div class="container py-4">
    <h1 class="display-6 mb-4 d-flex align-items-center gap-2">
        <span></span> Guitar Catalog
    </h1>

    @if (_guitars is null)
    {
        <div class="d-flex align-items-center" aria-label="Loading">
            <div class="spinner-border text-primary me-2" role="status">
                <span class="visually-hidden">Loading…</span>
            </div>
            <span>Loading guitars…</span>
        </div>
    }
    else if (!_guitars.Any())
    {
        <p class="text-muted">No guitars found.</p>
    }
    else
    {
        <div class="card shadow-sm">
            <div class="card-header bg-primary text-white fw-semibold">
                Guitar List
            </div>
            <div class="table-responsive">
                <table class="table table-hover mb-0 align-middle">
                    <thead class="table-light">
                        <tr class="small text-uppercase">
                            <th scope="col">Brand</th>
                            <th scope="col">Model</th>
                            <th scope="col">Series</th>
                            <th scope="col" class="text-end">Price</th>
                        </tr>
                    </thead>
                    <tbody>
                        @foreach (var g in _guitars!)
                        {
                            <tr>
                                <td>@g.Brand</td>
                                <td>@g.Model</td>
                                <td>@g.Series</td>
                                <td class="text-end">@g.Price.ToString("C")</td>
                            </tr>
                        }
                    </tbody>
                </table>
            </div>
        </div>
    }
</div>

@code {
    private List<GuitarDto>? _guitars;

    protected override async Task OnInitializedAsync()
    {
        _guitars = await HttpClient.GetGuitarsAsync();
    }
}
And with that, we have a table that lists everything in inventory.
Adding the Dashboard
Now that we’ve got an app, let’s add some observability to it by using the .NET Aspire dashboard.
Which Dashboard to Choose?
We have two choices: using standalone mode or a .NET Aspire project.
With standalone mode, you can pull a Docker image and use it without the rest of .NET Aspire. Let’s say your Operations team needs a “single pane of glass” for all your services—say, half of your services are in .NET and the rest are in Node or Python.
One single dashboard can ingest everyone’s OpenTelemetry (OTLP) traffic without worrying about who wrote the code. Additionally, it can run as its own container or deployment and stay up even if your app crashes.
We’ll be using the built-in Aspire dashboard. This shines during our inner-loop process: change code, hit F5 in Visual Studio and watch the traces. That way, the dashboard appears automatically and is wired to every container, project and secret we know about.
With that in mind, we’ll start to Aspire-ify our project.
Add Aspire to Our Existing Application
There are many ways to add Aspire to an existing app; for us, we’ll do it through Visual Studio tooling.
In Visual Studio, let’s create a new project and search for the .NET Aspire App Host template.
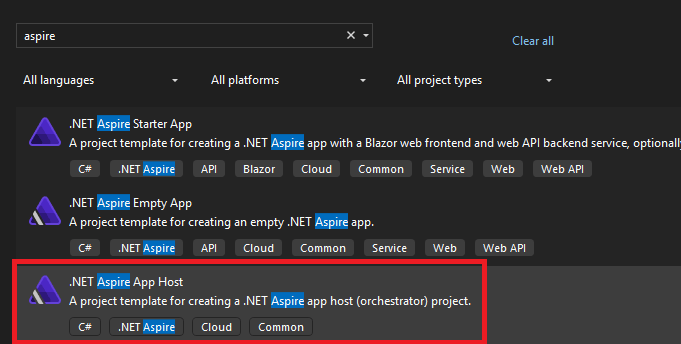
Once you add the project, you’ll see two new projects added to Solution Explorer: an AppHost project and a ServiceDefaults library project. Let’s talk about the AppHost project (we will cover ServiceDefaults in detail in our next post).
The AppHost Project
We can think of AppHost as a command center for our application. Instead of juggling a bunch of configs, Docker Compose files and scripts, this project has a single launch profile that boots our app and its dependencies with access to one fully wired dashboard.
By default, the file includes these two lines that really pack a punch:
var builder = DistributedApplication.CreateBuilder(args);
builder.Build().Run();
This code scans every referenced project or container image, builds a dependency graph, injects environment variables (like connection strings and secrets), and launches the .NET Aspire dashboard.
How does it all work?
- AppHost starts.
- For each project, it runs with a generated launch command.
- It runs
docker runbehind the scenes for each container. - It sets environment variables like
Api__BaseAddressandConnectionStrings__DefaultConnection. - The service defaults (to be discussed next time!) discover the dashboard endpoint at
OTEL_EXPORTER_OTLP_ENDPOINT. - You have a glorious dashboard to use out of the box.
Before we launch the app and see it in action, let’s add a few lines of code to our AppHost project.
var builder = DistributedApplication.CreateBuilder(args);

var api = builder.AddProject<Projects.Api>("api");

builder.AddProject<Projects.Frontend>("frontend")
    .WithReference(api)
    .WaitFor(api)
    .WithExternalHttpEndpoints();

builder.Build().Run();
From a high level, here’s what happens:
DistributedApplication.CreateBuilder(args)creates a builder that will handle every service, container and config value.AddProject<Projects.Api>("api")tells the builder to spin up the API container and have it addressable asapifor other services to reference.- For the frontend,
AddProject<Projects.Frontend>("frontend")registers the UI andWithReference(api)hands the UI the API’s base URL. Then,WaitFor(api)makes the UI wait until the API is healthy. Finally,WithExternalHttpEndpoints()exposes the UI so a browser can reach it.
There is much, much more we can (and will!) do here, but for now, this will help us “connect” the UI with the API in our dashboard.
Enough already! Let’s see it.
The Dashboard in Action
Right away, we see a unified interface for our application. Here you can easily navigate to our services and quickly access logs, traces and metrics in one spot.
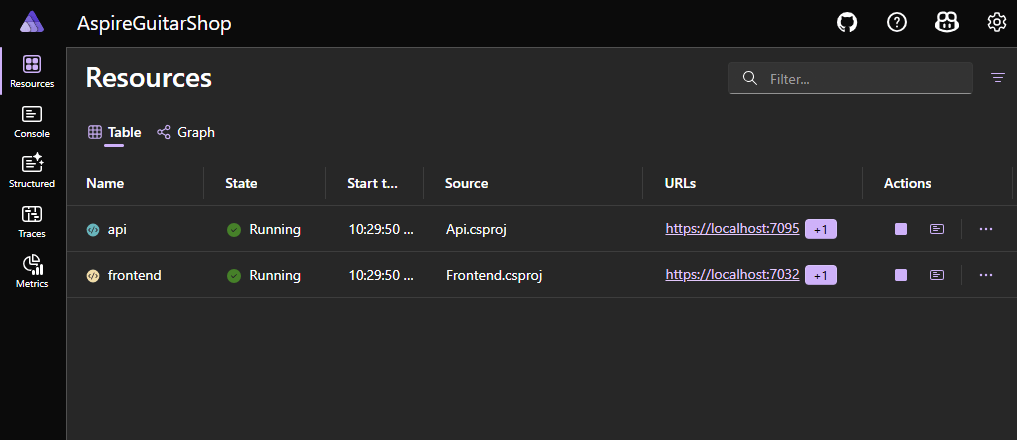
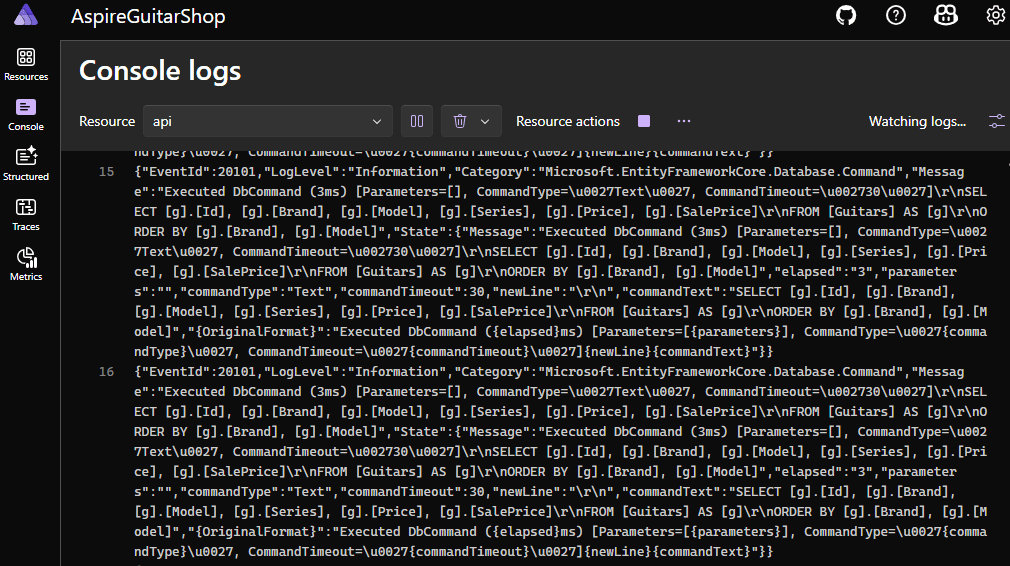
If we click over to the Console section, you can select from the api or frontend logs. No more painful toggling between multiple consoles!
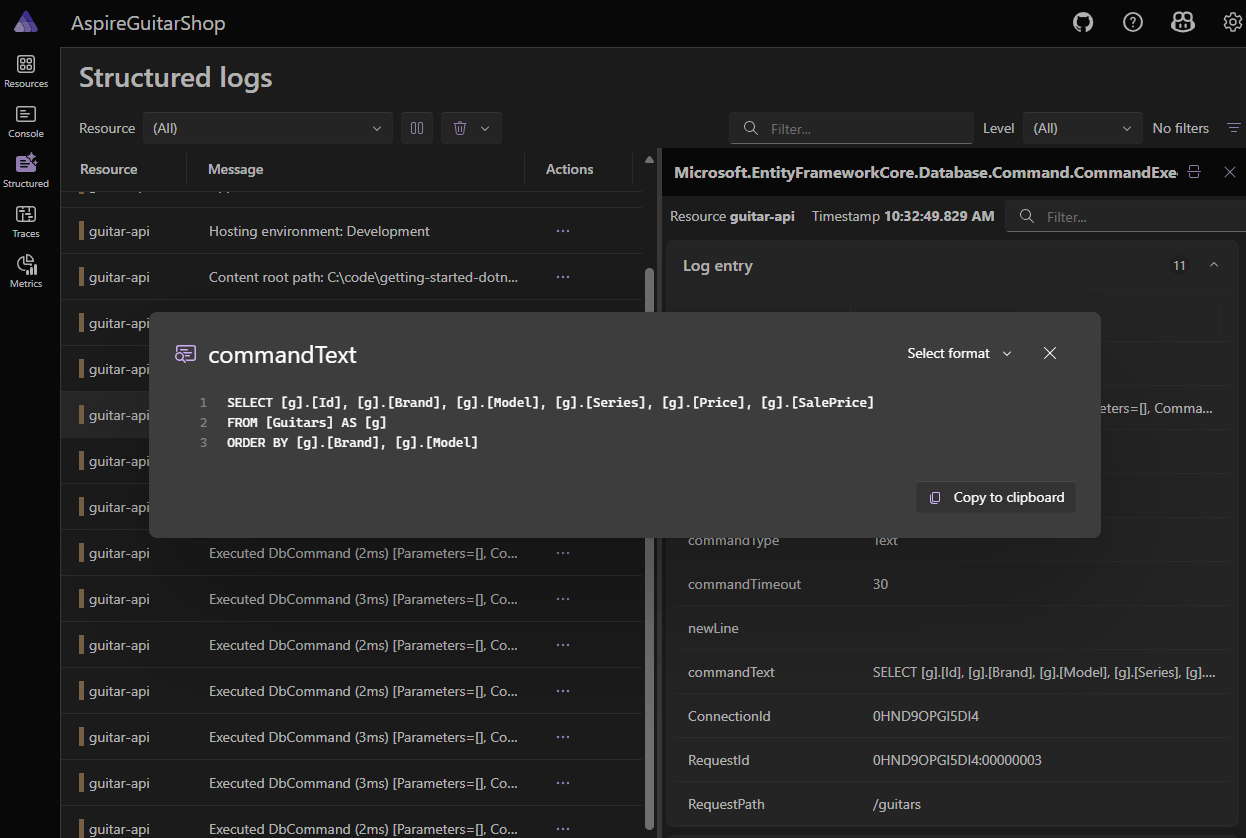
We have structured logging that allows us to easily filter on what we need, like a SQL command:
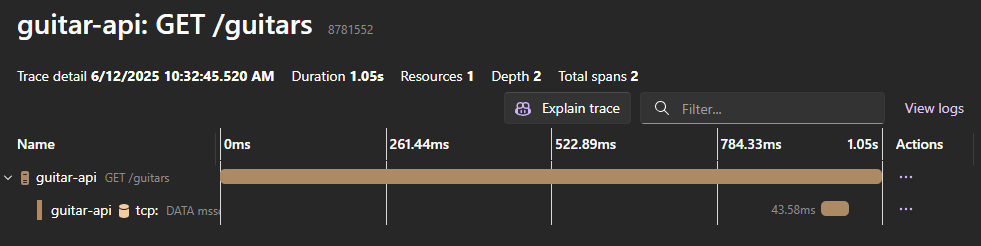
With traces, we can run through our dependencies and how long they take. For now, we can see details of the HTTP request and the SQL call.
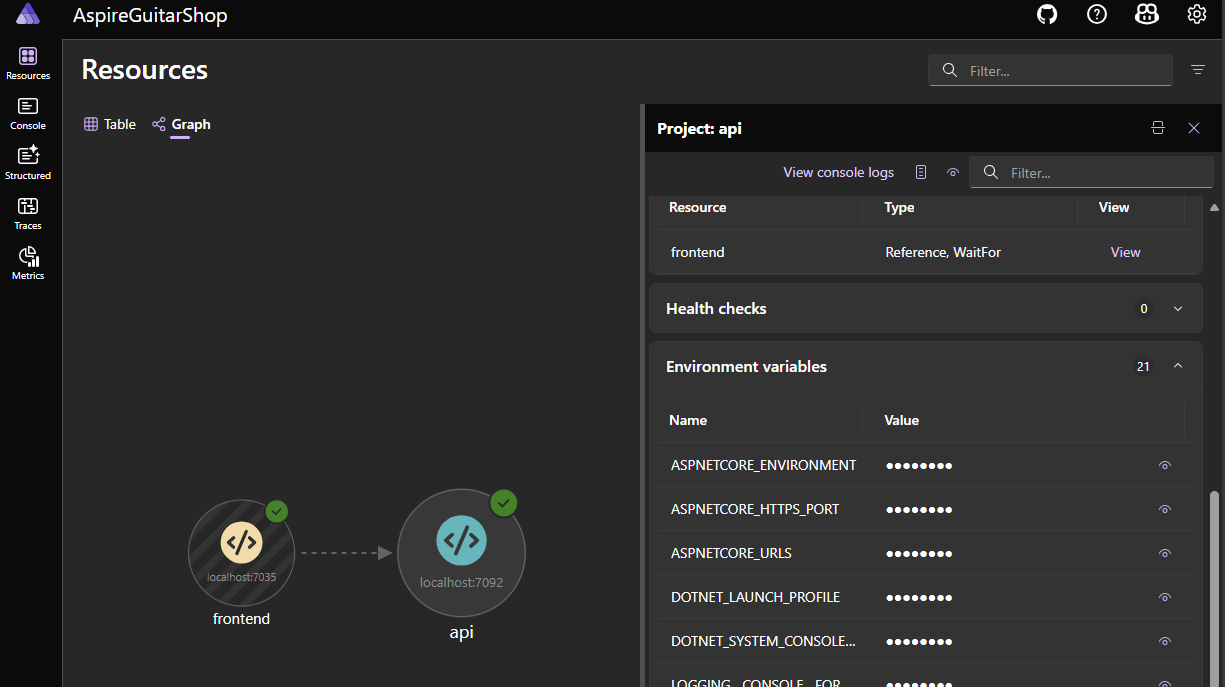
We also have pre-baked metrics and a dependency graph (which will get more interesting over this series, I promise).

If you click api, you can get information on health checks and the environment variables Aspire uses.
There are many more features I don’t have space to cover, like: dashboard authentication, metrics and GitHub Copilot integration. I’d suggest building a new Aspire project and clicking around for yourself. I don’t think I can go back to local debugging and tracing before Aspire.
Wrapping Up
I hope you enjoyed learning more about the .NET Aspire doashboarding capabilities. Next time, we’ll work on integrations and smart defaults, where we can add our SQL Server container with just a few lines of code.
See you then, and happy coding!
This content originally appeared on Telerik Blogs and was authored by Dave Brock