This content originally appeared on DEV Community and was authored by Timilehin Olatunde
What is Azure Resource Group?
Azure Resource Groups: Organizing & Managing Cloud Resources Efficiently.
A Resource Group is a logical unit where related Azure resources—such as virtual machines, databases, storage accounts, and networking components—are grouped together.
A resource group is like a folder that helps you organize and manage cloud resources (like virtual machines, databases, network interfaces, etc.) that share a common lifecycle.
 Think of it as a folder that holds all resources associated with a specific application, project, or department.
Helps with simplified management, cost tracking, and lifecycle organization.
Deleting a Resource Group also removes all resources inside it—making cleanup easier!
 Common Use Cases:
Grouping resources for a single application (e.g., web app + database + storage).
Managing permissions and access via Role-Based Access Control (RBAC).
Applying policies or tags to track cost, location, environment (e.g., dev/test/prod).
Facilitating resource deployment and deletion — you can delete everything in the group at once.
 Example:
Imagine you’re deploying an e-commerce site:
You create a resource group called EcomRG
Inside it, you include:
A web app
Azure SQL Database
Azure Storage account
Virtual Network
Application Gateway
Now you can manage everything under one roof.
 Why It’s Important:
Helps enforce security, cost control, and operational efficiency.
Simplifies DevOps, automation, and infrastructure-as-code deployments.
STEPS TO CREATE AZURE RESOURCE GROUP
Prerequisite: Have an Azure account
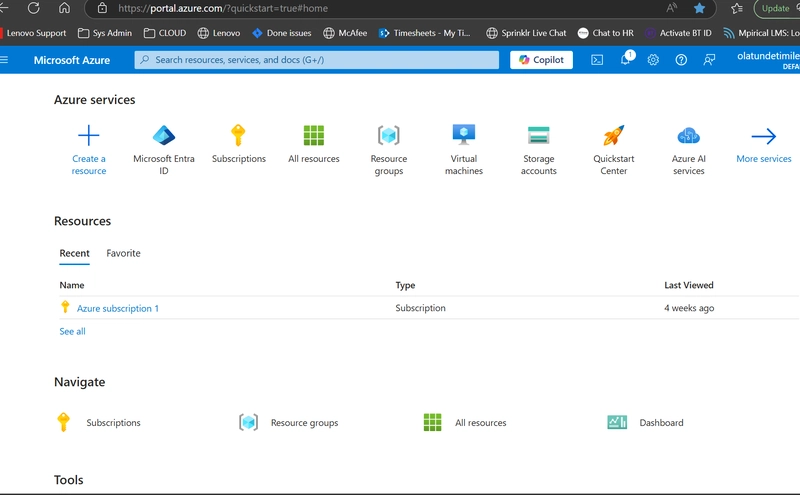
Step 1
Login into your Azure account from portal.azure.com and you will see the page below:
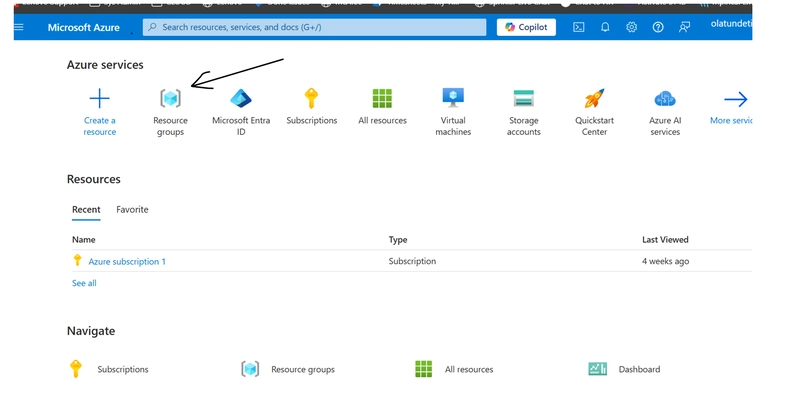
Step 2
Click on Resource Group as depicted with the arrow
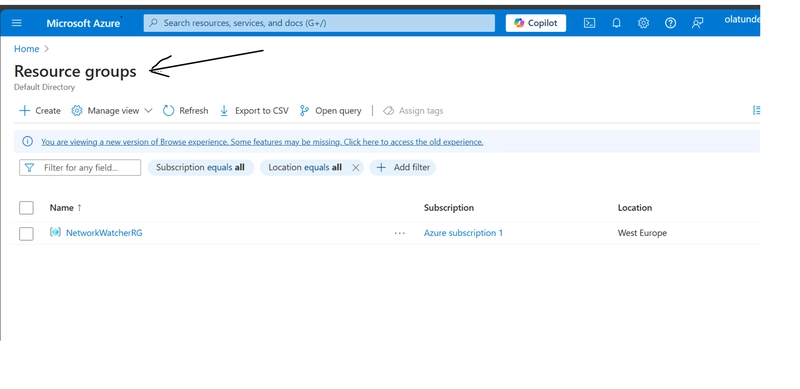
Your will notice that the “resource Group” has been created as shown with the arrow below
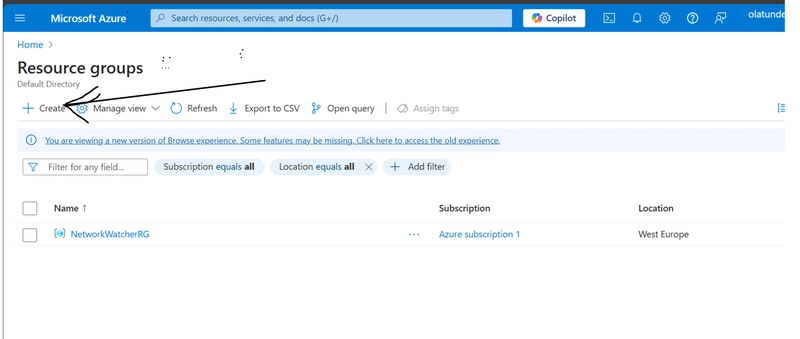
Step 3
Next is to click “Create” as shown with the arrow in other to create a new Resource Group
Then a new page as shown below is displayed as below, where you can now create your Resource Group:

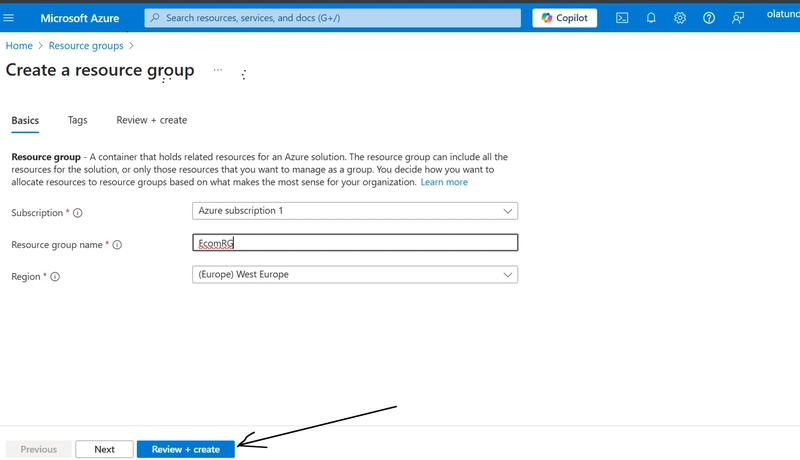
Step 4
Then Name your Resource Group. lets give it a name “EcomRG” and select the region where you want to keep your resources as below. I have chosen west Europe. (Choose the location closest to you or to your customers or where the required resources are available)

Step 5
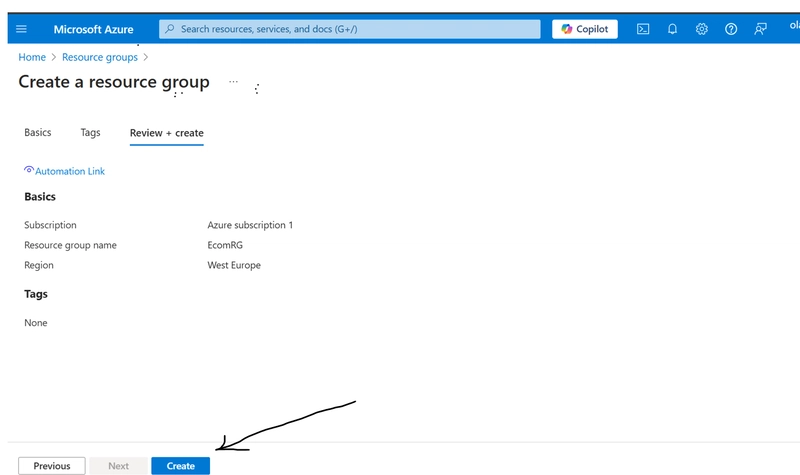
We have done everything at this page. Next is to click “Review and Create”
Then Click “Create” to finally create the Resource Group
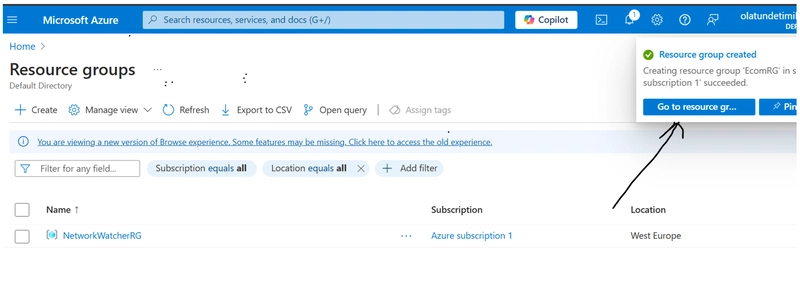
Step 6
Click “Go to Resource Group”
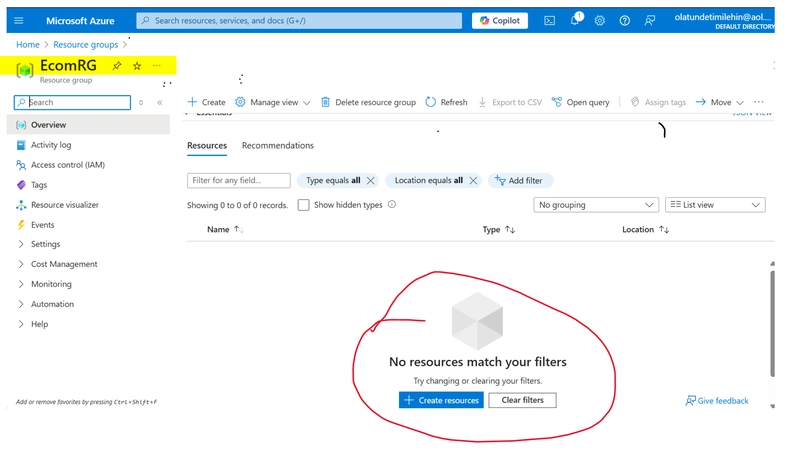
Now, you can see the the EcomRG resource group has been created as highlighted below and there is no resources created yet. You can now go ahead and create your resources.
I hope you enjoy the simple process I took you through. Do like and comment on this post to encourage me do more
This content originally appeared on DEV Community and was authored by Timilehin Olatunde