This content originally appeared on DEV Community and was authored by Iniobong Ema
Azure Virtual Machine Scale Sets
OVERVIEW OF VMSS
VMSS allow you to create and manage a group of load-balanced virtual machines (VMs) as a single unit, enabling easy scaling and high availability for applications.
WHAT VMSS IS
Azure Virtual Machine Scale Sets are a way of to deploy and manage a set of identical, auto-scaling virtual machines.
PURSPOSE OF VMSS
VMSS provides high availability and allows you to centrally manage, configure and update a large number of VMs.
Key Features & Benefits:
- Scalability: Automatically scale up or down the number of VMs based on demand or a defined schedule.
- High Availability: Deploy VMs across availability zones or fault domains for resilience.
- Load Balancing: Integrate with Azure Load Balancer for distributing traffic across VMs.
- Simplified Management: Manage a group of VMs as a single unit, simplifying deployment and updates.
- Customization: Use custom VM images, software, or disk sizes.
- Integration: Works well with other Azure services like Azure Monitor, Log Analytics, and Azure DevOps.
- Use Cases: Suitable for web applications, APIs, batch processing, big data, and container workloads.
HOW TO CREATE A LINUX VIRTUAL MACHINE SCALE SET
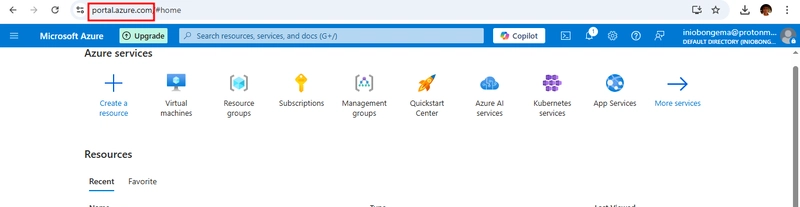
STEP 1: Sign-in to portal.azure.com
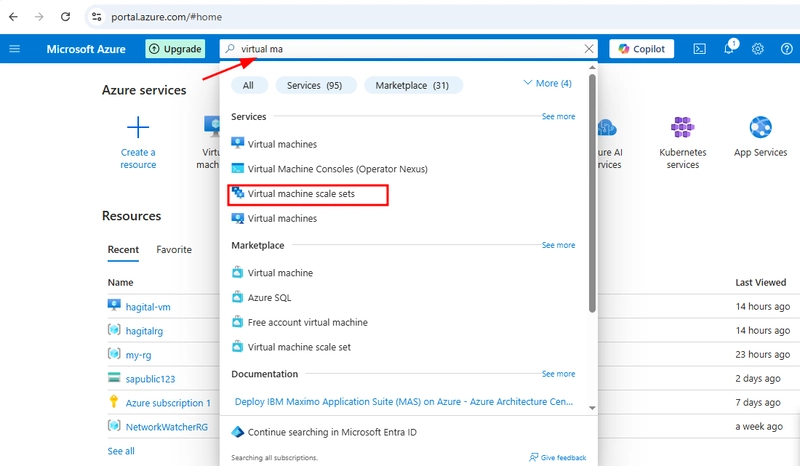
STEP 2: Create Virtual Machine Scale Set
Search for virtual machine scale set in the search box and select virtual machine scale sets.
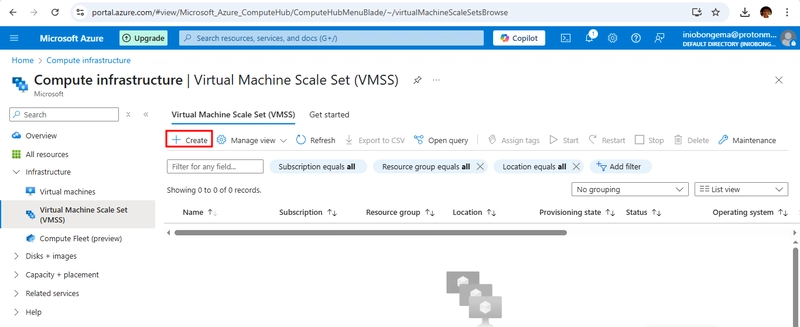
After selecting the Virtual Machine Scale Set, the page below will be displayed. Click on “Create”
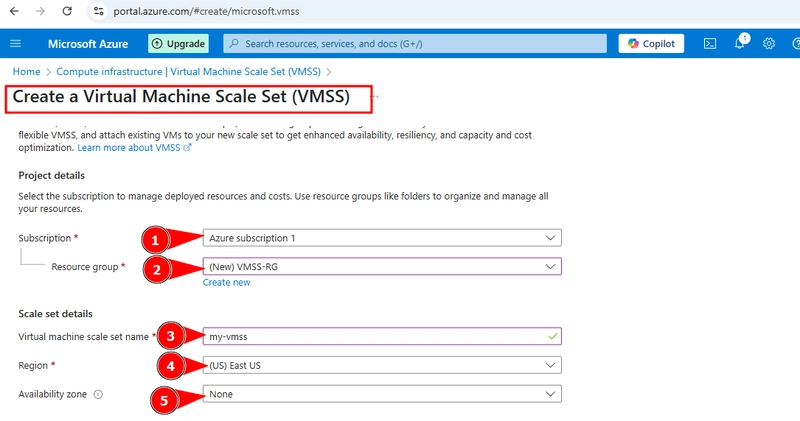
STEP 3: Fill the basic tab parameters.
- Subscription: leave at default
- Resource group: name it VMSS-RG
- VMSS name: Name it “my-vmss”
- Region: select ‘East US’
Under Orchestration mode;
- select the ‘Uniform’
- Under security, select ‘standard’
- under scaling mode, select ‘auto-scaling’
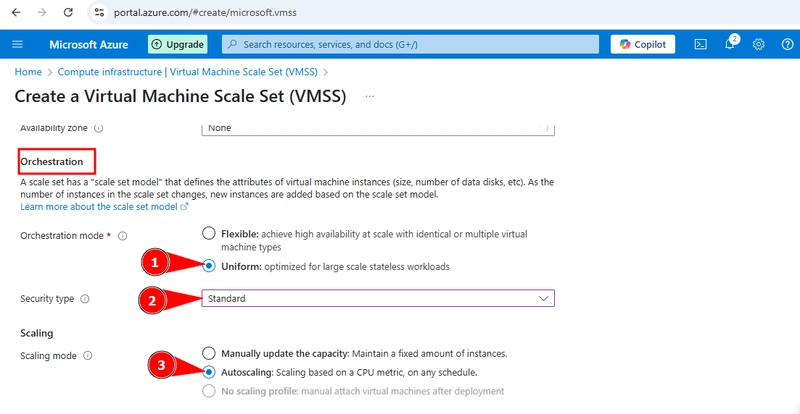
Under scaling configuration, click on ‘configure’
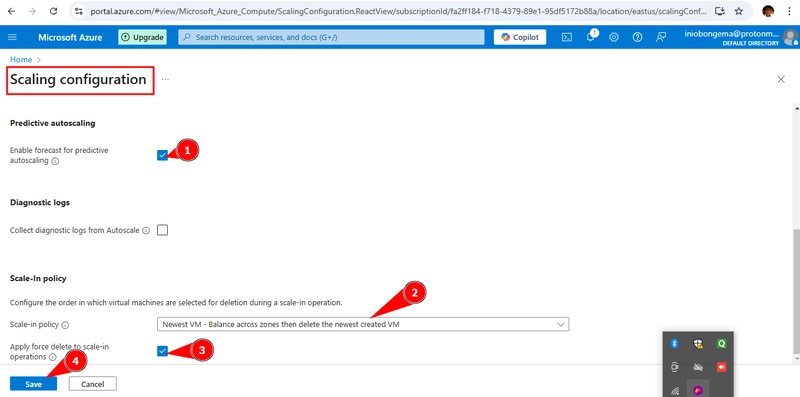
Scaling configuration;
1. under predictive auto-scaling, enable by ticking the box
leave diagnostic logs at default
2. under scale-in-policy, select newest vm-balance…
3. tick ‘apply force delete to scale-in-operation
4. click on ‘save’ to save the scaling configuration
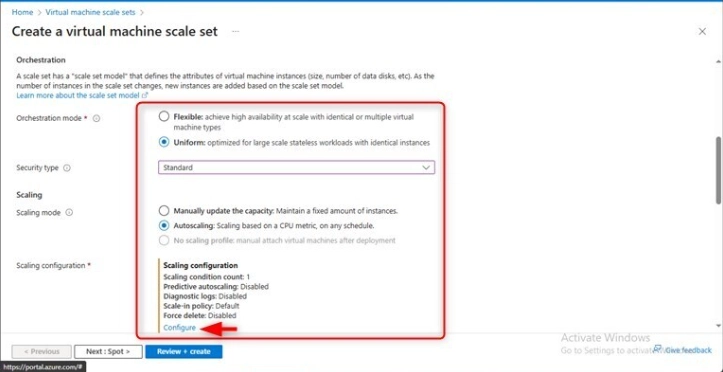
After clicking on the ‘save’ button, azure will take you to the ‘create a VMSS page to complete the settings.
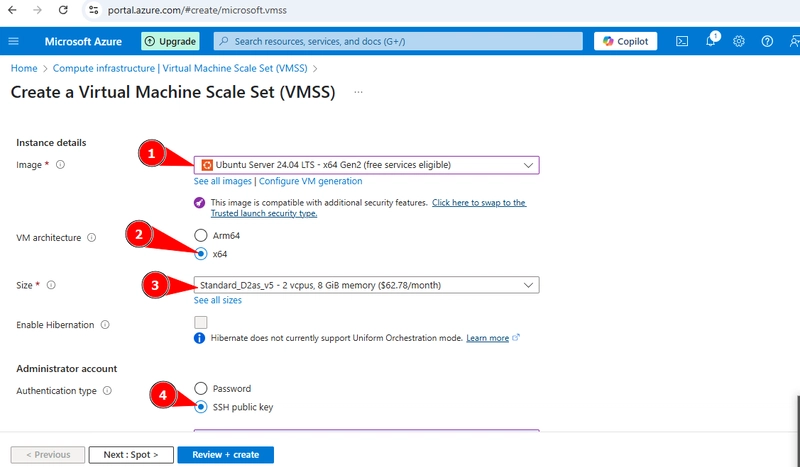
1. under image, select ubuntu server
2. under VM architecture, leave it at default
3. under size, select standard_D2 Series
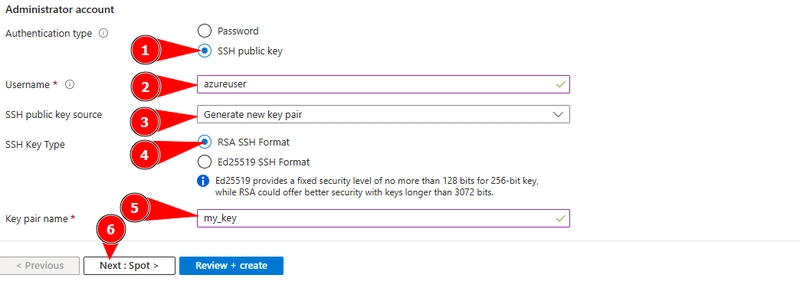
4. select SSH public key
Still scrolling down
 1.  under username, type 'azureuser'
 2.  leave SSH public key source at default 'generate new key
     pair'
 3.  under username, type 'azureuser'
 4.  leave SSH key type at default (RSA SSH_key)
 5.  under key pair name, type my_key
 6.  Then click on 'Next spot' to continue
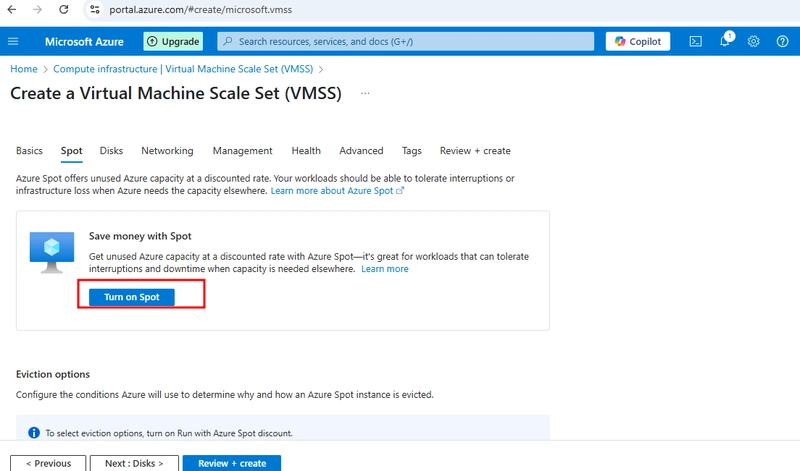
SPOT BAR
Under spot bar, leave ‘turn on spot’ at default
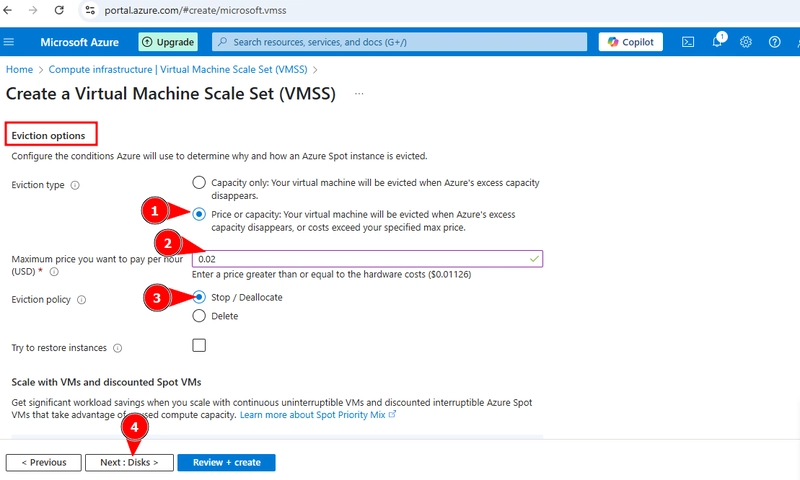
Under eviction options;
- select ‘price for eviction type’
- type 0.02 for maximum price
- select ‘stop’ for eviction policy
- click on ‘Next:Disk’
DISK BAR
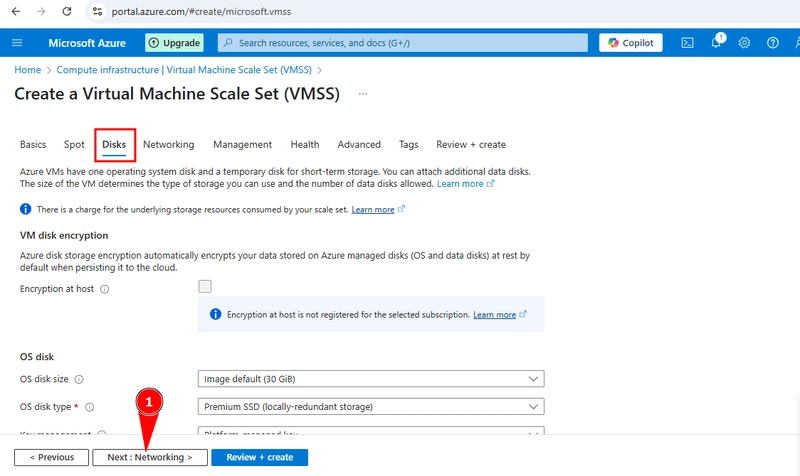
On the Disk bar, leave everything at default and click on ‘Networking’
NETWORKING BAR
Under Networking bar,
click on the pen icon to check if NIC is configured properly
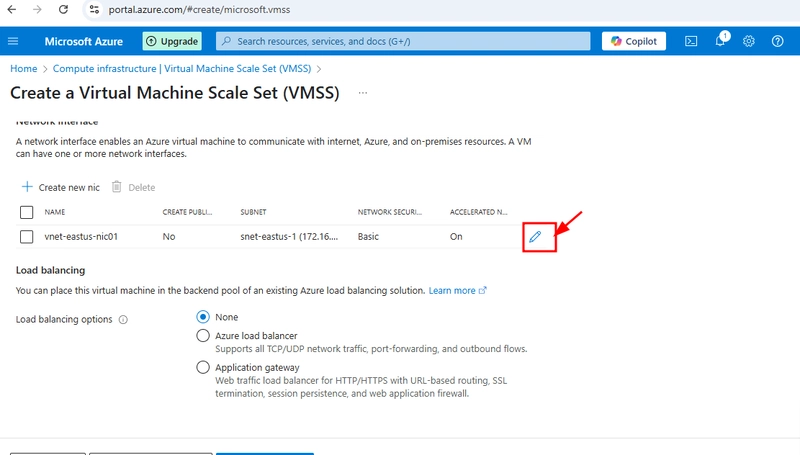
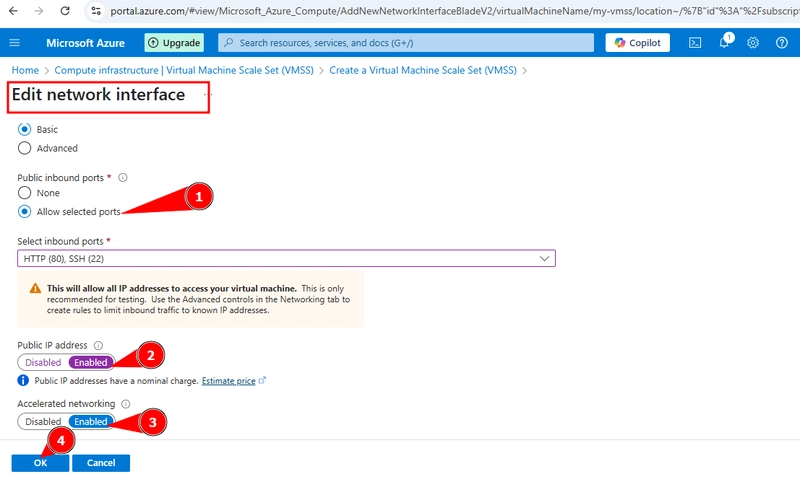
Ensure you check the edited network interface. Select;
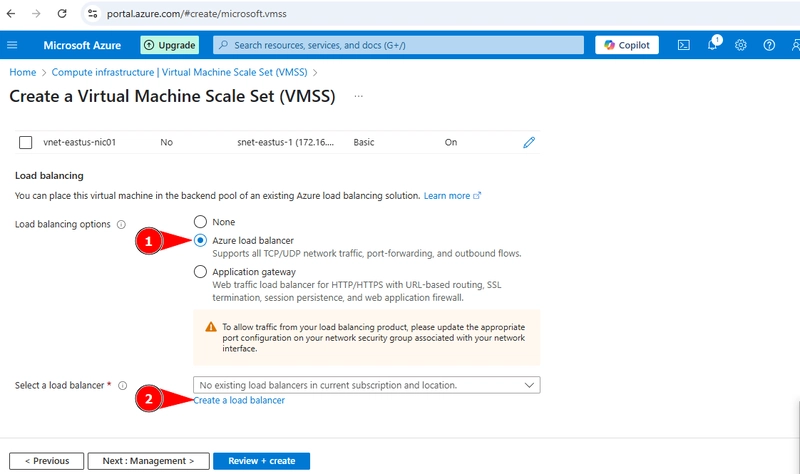
- click on ‘Azure load balancer’
- click on ‘create a load balancer’
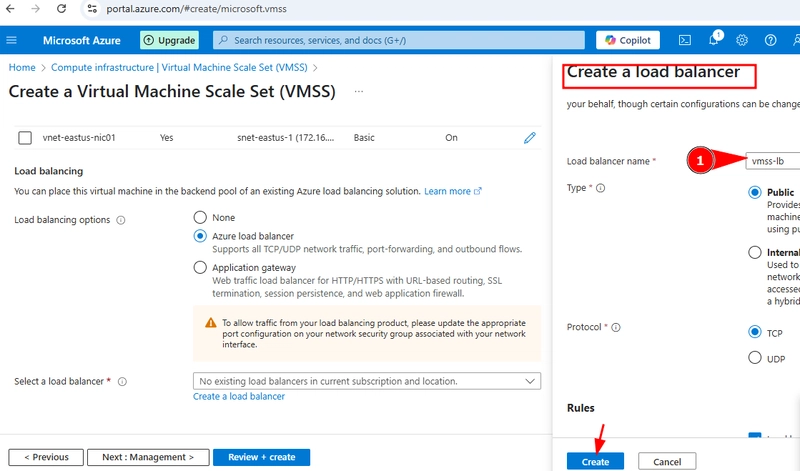
Create a load Balancer
- Give the balancer a name, vmss-lb Allow other features at defult Then click on ‘Create’
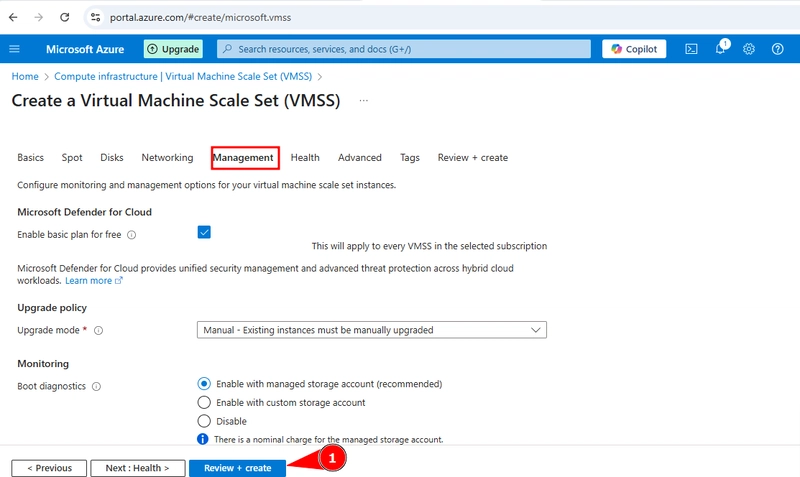
MANAGEMENT BAR
Under management bar, leave everything at default and click on ‘Review and Create’
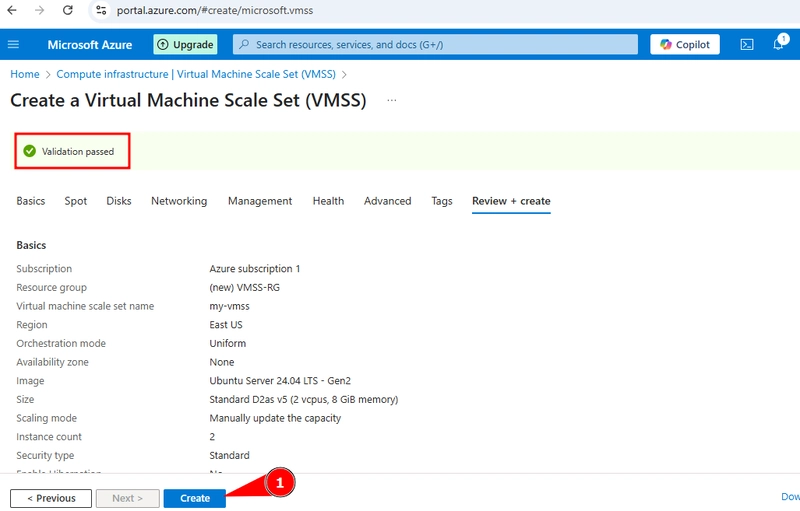
After clicking on ‘Review and Create’. the page below will appear. The final validation is running. when the process is successful, the page below will be displayed
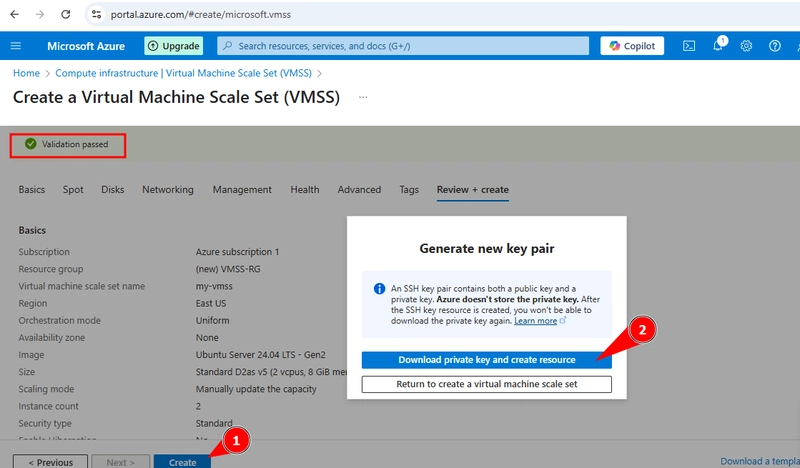
Click on ‘Create’, click on ‘download private key and create resource’
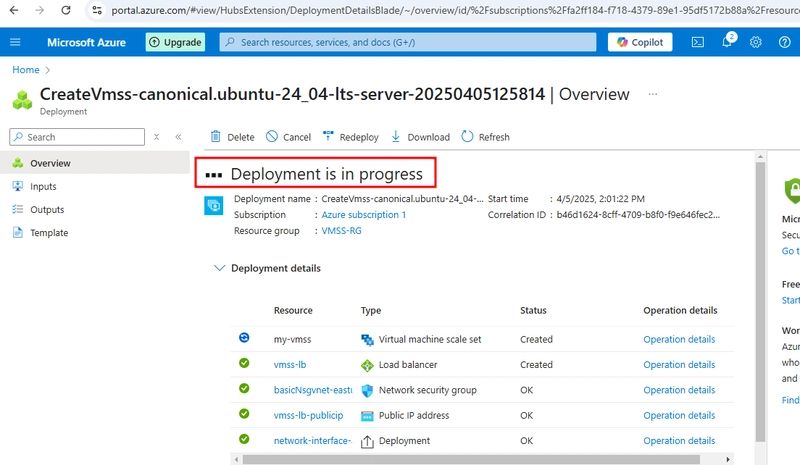
The vmss is deploying as shown below
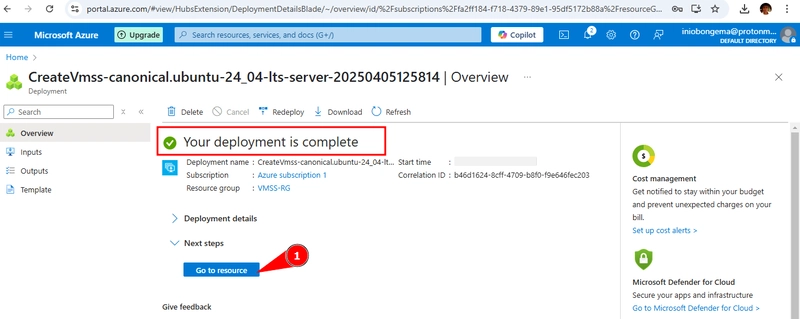
The deployment is complete, click on ‘go to resource’
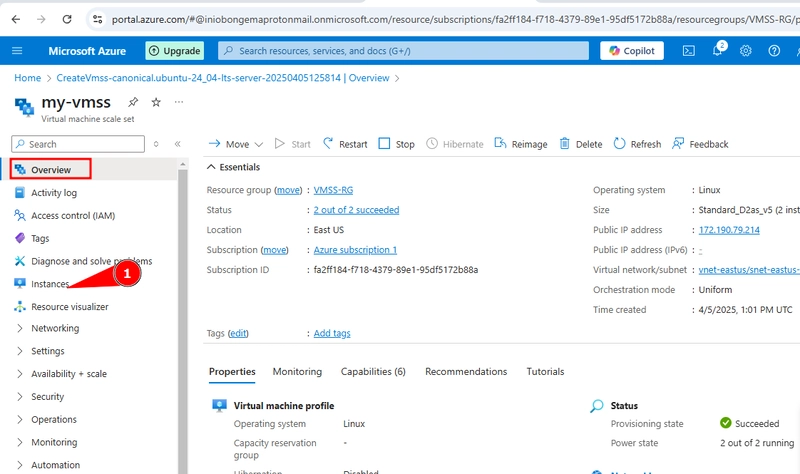
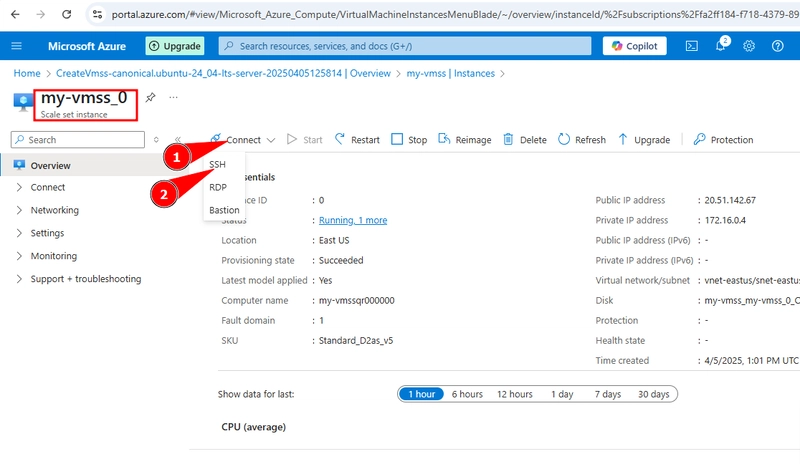
Below is the overview page of the vmss, click on ‘instances’ on the left pane
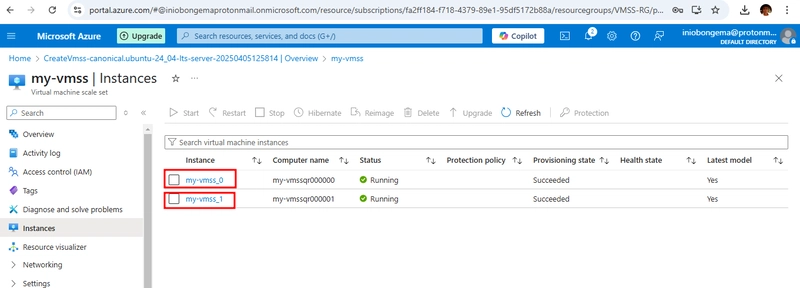
Two vmss is running, vmss 0 and 1
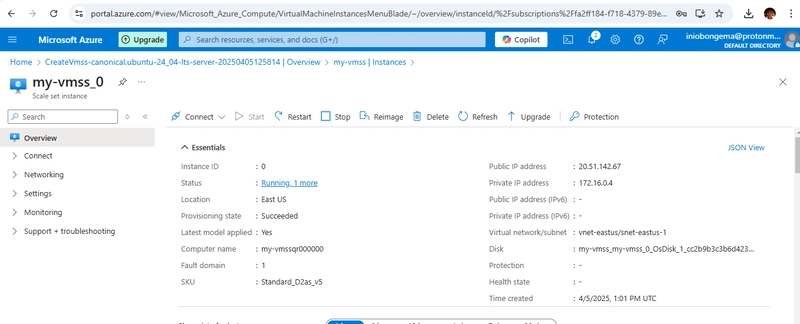
Each of the vmss can be added connected to each other. below is the page
Click on ‘connect’ then ssh
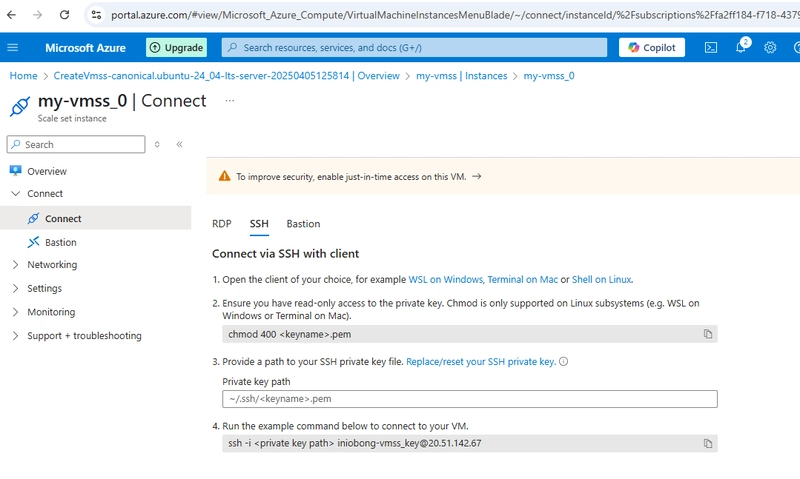
The page below will be displayed
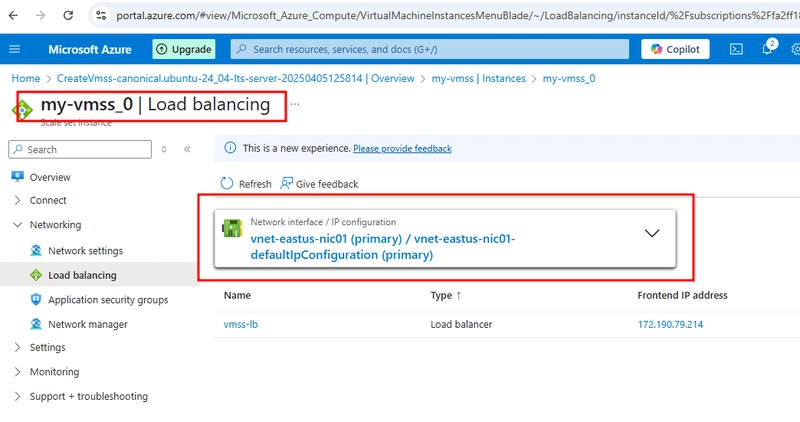
Click on Networking then ‘load balancing’ on the left pane to see the load balancer created before.
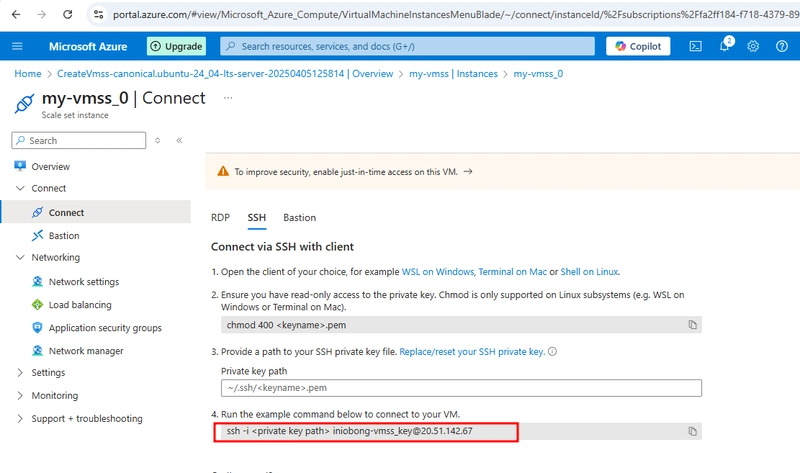
Go to ‘connect’, connect again

Copy the ssh command to run it
This content originally appeared on DEV Community and was authored by Iniobong Ema