This content originally appeared on DEV Community and was authored by Madhurima Rawat
 Hello Cloud Architects, Time to Build!
Hope your VM is running well
and never crashes!
*
 All code, docs, and resources are available in my GitHub repository:
 madhurimarawat
/
Cloud-Computing
madhurimarawat
/
Cloud-Computing
This repository focuses on cloud computing and demonstrates how to set up virtual machines, S3, and other services using LocalStack. It provides a comprehensive guide to simulating AWS services locally for development and testing purposes.
Cloud-Computing
This repository focuses on cloud computing and demonstrates how to set up virtual machines, S3, and other services using LocalStack. It provides a comprehensive guide to simulating AWS services locally for development and testing purposes.
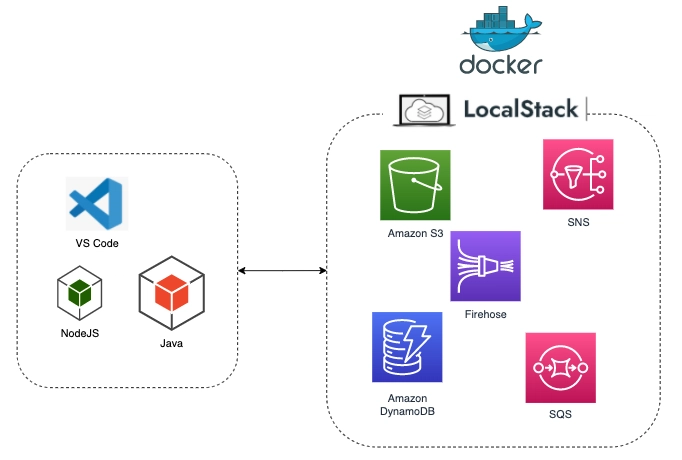
Tools and Technologies 

1. AWS CLI
AWS Command Line Interface (CLI) is a powerful tool that allows users to interact with AWS services directly from the terminal. It simplifies managing cloud resources by providing commands for a wide range of AWS services, enabling tasks such as provisioning, managing, and automating workflows with ease.
2. LocalStack
LocalStack is a fully functional, local testing environment for AWS services. It enables developers to simulate AWS services on their local machines, facilitating the development and testing of cloud-based applications without needing access to an actual AWS account.
3. Docker
Docker is a containerization platform that allows developers to build, share, and run applications in isolated environments called…
In the previous article:

We learned how to set up a Virtual Machine (VM) in LocalStack. Now, let’s take it a step further and deploy a web application on our cloud server using this VM!
What’s Ahead?
Before diving into deployment, we’ll first understand cloud deployment, LocalStack, and the overall cloud deployment process, including EC2. Then, we’ll walk through the detailed deployment process—and trust me, it’s going to be a long ride!
This article is much longer than the previous one because I encountered lots of errors and included extensive troubleshooting steps. Every command and parameter is explained in detail to help you avoid common pitfalls.
So, buckle up your VMs and let’s get started! 
Understanding Cloud Deployment with LocalStack
Cloud deployment refers to the process of hosting applications, databases, and services on remote cloud infrastructure rather than on local machines. It enables scalability, flexibility, and accessibility, making applications available globally. When deploying a web server in the cloud, the server runs on a virtual machine (like AWS EC2), where users can interact with it over the internet.
Key Benefits of Cloud Deployment:
- Scalability – Easily scale resources up or down based on demand.
- High Availability – Applications remain accessible even if some resources fail.
- Cost Efficiency – Pay only for the resources used.
- Security & Compliance – Cloud providers offer robust security measures.
- Global Reach – Deploy services closer to users worldwide.
Using LocalStack for Cloud Deployment
LocalStack is an open-source tool that simulates AWS services locally, allowing developers to test and deploy cloud applications without using real AWS infrastructure. It provides a local environment for running services like EC2, S3, Lambda, and API Gateway, reducing cloud costs and improving development speed.
Cloud Deployment Process
Below is an illustration of the cloud deployment process, showing how applications move from local development to a fully hosted cloud environment:
Understanding EC2
Amazon Elastic Compute Cloud (EC2) provides scalable compute capacity in the cloud. EC2 instances act as virtual machines where applications can be deployed. Key benefits include:
- On-demand scalability: Instances can be started, stopped, or resized as needed.
- Flexible configurations: Different instance types offer varying CPU, memory, and storage capacities.
- Security: Users can define firewall rules and networking policies using security groups.

Step-by-Step Guide
Step 1: Start LocalStack
Run the following command to start LocalStack:
localstack start
Alternatively, use Docker:
docker run --rm -it -p 4566:4566 localstack/localstack
Start Docker Desktop
- Launch Docker Desktop and wait until it indicates that “Docker is running.”
- LocalStack will simulate AWS services on port
4566, allowing local cloud development without an actual AWS account.
Step 2: Steps to Set Up a Virtual Machine in LocalStack
- Simulate EC2 Service:
LocalStack emulates a limited set of EC2 functionalities. The goal is to create mock resources like key pairs, security groups, and instances.
- Create a Key Pair:
Use the AWS CLI to generate a key pair:
   aws ec2 create-key-pair --key-name local-key
   --endpoint-url=%AWS_ENDPOINT_URL%
The output will include the generated public/private key pair.
- Create a Security Group:
Create a security group to define network rules:
   aws ec2 create-security-group --group-name local-sg --description
   "Local Security Group" --endpoint-url=%AWS_ENDPOINT_URL%
- Run an Instance:
Launch a mock EC2 instance using:
   aws ec2 run-instances
     --image-id ami-12345678
     --count 1
     --instance-type t2.micro
     --key-name local-key
     --security-group-ids sg-12345678
     --endpoint-url=%AWS_ENDPOINT_URL%
Replace ami-12345678 with an example AMI ID that is recognized by LocalStack.
Example output:
- Security Group ID: sg-2cd410ccd533c7f8b
- Image ID: ami-a2678d778fc6
Command:
aws ec2 run-instances --image-id ami-a2678d778fc6 --count 1 --instance-type t2.micro
--key-name local-key
--security-group-ids sg-2cd410ccd533c7f8b --endpoint-url=%AWS_ENDPOINT_URL%
Explanation of Parameters
aws ec2 run-instances
- This is the AWS CLI command to launch one or more Amazon EC2 instances.
--image-id ami-a2678d778fc6
- What it is: The unique ID of the Amazon Machine Image (AMI) we want to use.
- Why it matters: An AMI is like a template that defines what the instance will look like, including its operating system, software, and configuration.
- Example: If we want to run an Ubuntu server, we select an AMI ID for an Ubuntu image.
--count 1
- What it is: The number of EC2 instances to create.
-
Why it matters: we can launch multiple instances at once. In this case,
1means we’re creating a single instance.
--instance-type t2.micro
- What it is: The type of EC2 instance to launch.
- Why it matters: Instance types determine the amount of CPU, memory, and networking performance available.
-
Example:
t2.microis a small, low-cost instance type suitable for lightweight tasks or free-tier usage.
--key-name local-key
- What it is: The name of the key pair to use for SSH access to our instance.
- Why it matters: A key pair ensures secure access to the instance. we’ll need the private key file associated with this name to log in.
--security-group-ids sg-2cd410ccd533c7f8b
- What it is: The ID of the security group to associate with the instance.
- Why it matters: Security groups act as firewalls for our instance, controlling which traffic is allowed to enter or leave.
- Example: we might configure it to allow SSH (port 22) or HTTP (port 80) traffic.
-
--endpoint-url=%AWS_ENDPOINT_URL%- What it is: Specifies a custom endpoint URL for our AWS service.
- Why it matters: This is useful when working with a local AWS emulator (e.g., LocalStack) or custom AWS environments.
-
Example:
%AWS_ENDPOINT_URL%expands to the URL we set earlier, such ashttp://localhost:4566.
What Happens When we Run This Command?
- The AWS CLI will create a single EC2 instance based on the AMI (
ami-a2678d778fc6). - The instance will be of type
t2.micro, suitable for low-resource tasks. - The instance will use the
local-keykey pair for SSH access. - The security group (
sg-2cd410ccd533c7f8b) will control the traffic to and from the instance. - The endpoint URL will be used to connect to the specified AWS service.
Example Use Case
- We want to set up a small server (like an Ubuntu instance) locally for testing, using our custom AWS endpoint URL (
http://localhost:4566) with specific security and access configurations.
- List Instances:
-
Verify the instance creation:
aws ec2 describe-instances --endpoint-url=%AWS_ENDPOINT_URL%
Note: LocalStack doesn’t run real EC2 instances, but it will simulate their API behavior.
Step 4: Deploy a Web Application
This is a Flask app (app.py):
from flask import Flask, jsonify
import boto3
import socket
import logging
import os

app = Flask(__name__)

# Check if running on LocalStack or real AWS
if os.environ.get("LOCALSTACK_URL"):
    endpoint_url = "http://localhost:4566"  # LocalStack endpoint for testing locally
else:
    endpoint_url = None  # Use default AWS endpoints when running on AWS directly

# Initialize a session using Amazon EC2 (LocalStack or AWS)
ec2 = boto3.client(
    "ec2", region_name="us-east-1", endpoint_url=endpoint_url
)  # LocalStack URL if running locally

# Enable logging for debugging purposes
logging.basicConfig(level=logging.DEBUG)


@app.route("/")
def home():
    return "Hello, Cloud Deployment!"


@app.route("/instance-stats")
def instance_stats():
    try:
        logging.debug("Fetching EC2 instance metadata...")

        # Fetch EC2 instance stats using boto3
        response = ec2.describe_instances()

        # Debugging: Check the response from the describe_instances call
        logging.debug(f"API Response: {response}")
        if not response["Reservations"]:
            logging.warning("No EC2 instances found in the response.")

        # Get the first instance (assuming there's at least one instance)
        instance_info = response["Reservations"][0]["Instances"][0]
        logging.debug(f"Instance Info: {instance_info}")

        instance_stats = {
            "Instance ID": instance_info["InstanceId"],
            "Instance Type": instance_info["InstanceType"],
            "Public IP": (
                instance_info["PublicIpAddress"]
                if "PublicIpAddress" in instance_info
                else "N/A"
            ),
            "State": instance_info["State"]["Name"],
            "Region": "us-east-1",
        }

        logging.debug(f"Returning instance stats: {instance_stats}")
        return jsonify(instance_stats)

    except Exception as e:
        logging.error(f"Error: {str(e)}")
        return jsonify({"error": str(e)})


if __name__ == "__main__":
    app.run(host="0.0.0.0", port=5000)
Start the app:
python app.py
Explanation:
-
Instance Stats: I added a new
/instance-statsroute that fetches basic details about the EC2 instance running this Flask app using theboto3library.
- Instance ID, Instance Type, Public IP, State, and Region are returned.
- The
socket.gethostname()can be replaced with any specific instance metadata or more AWS-related logic.
- AWS API Gateway Command: We already have the command to create a REST API for our Flask app in AWS API Gateway:
   aws apigateway create-rest-api --name "MyAPI"
   --endpoint-url=$AWS_ENDPOINT_URL
We can integrate this API Gateway endpoint to serve the Flask app through API Gateway by creating a proxy resource or a direct API method to forward traffic from the web.
Steps to deploy:
-
Install Boto3: We need to install
boto3(the AWS SDK for Python) if it’s not already installed.
pip install boto3
- Cloud Deployment: Once our Flask app is working locally, we can containerize it using Docker, then deploy it to an AWS service like EC2, ECS, or Lambda, or expose it through API Gateway as described.
To deploy our locally running Flask app to AWS using API Gateway, need to follow these steps:
Steps to Deploy Flask App Using AWS API Gateway
-
Package our Flask App:
- First, we need to make sure our Flask app is production-ready. This typically involves containerizing our app with Docker and then deploying it to AWS Elastic Beanstalk or Amazon EC2.
- Prepare Flask App for Deployment: If we’re running the app locally, we’ll need to containerize it to easily deploy it with AWS services. Here’s how we can do that:
-
Create a
Dockerfilefor our Flask app:
# Use the official Python image from the DockerHub FROM python:3.9-slim # Set the working directory in the container WORKDIR /app # Copy the current directory contents into the container at /app COPY . /app # Install the required dependencies RUN pip install -r requirements.txt # Expose the port on which the app will run EXPOSE 5000 # Set the environment variable for Flask ENV FLASK_APP=app.py ENV FLASK_RUN_HOST=0.0.0.0 # Command to run the app CMD ["flask", "run"] -
Create a
requirements.txt:
 flask
 boto3
- Build the Docker Image: In the directory where our Flask app is located, run the following command to build the Docker image:
docker build -t flask-app .
- Run the Docker Container Locally (Optional): To test it locally before deploying, run the following:
docker run -p 5000:5000 flask-app
- Push Docker Image to Amazon ECR (Elastic Container Registry):
-
Create a repository in ECR (Elastic Container Registry) to store our Docker image:
aws ecr create-repository --repository-name flask-app -
Authenticate Docker to our Amazon ECR:
aws ecr get-login-password --region us-east-1 | docker login --username AWS --password-stdin <aws_account_id>.dkr.ecr.us-east-1.amazonaws.com -
Tag our Docker image to match the repository in ECR:
docker tag flask-app:latest <aws_account_id> .dkr.ecr.us-east-1.amazonaws.com/flask-app:latest -
Push the image to ECR:
 docker push <aws_account_id>
 .dkr.ecr.us-east-1.amazonaws.com/flask-app:latest
- Integrating API Gateway: Once our Flask app is deployed (via Elastic Beanstalk or EC2), integrate it with our API Gateway:
- In the API Gateway Console, create a new API if we haven’t already.
- Create a new resource and method (e.g., GET or POST) under the root resource or any other resource.
- Choose HTTP as the integration type and provide the endpoint URL of our Flask app (e.g., Elastic Beanstalk URL or EC2 public IP).
- After configuring the integration, deploy the API to a stage (e.g.,
prod).
- Invoke the API: Once the API is deployed, we will get a URL for the endpoint. we can now access our Flask app via that URL.
Example API Gateway Integration:
-
Create Resource:
- In the API Gateway console, create a new resource
/flaskappand aGETmethod under it.
- In the API Gateway console, create a new resource
-
Set Integration Type:
- Choose HTTP for integration type, and in the Endpoint URL field, enter the URL of our Flask app (e.g., our Elastic Beanstalk URL or EC2 instance URL).
-
Deploy API:
- After setting up our resource and method, deploy it to a stage like
prod. - The URL for the API will look something like this:
https://<api-id>.execute-api.us-east-1.amazonaws.com/prod/flaskapp.
- After setting up our resource and method, deploy it to a stage like
Final Notes:
- If we are using EC2 instead of Elastic Beanstalk, we will need to configure the EC2 security group and ensure our Flask app is listening on the appropriate port (5000).
- we might also want to configure API Gateway to handle any needed authentication or rate limiting, depending on our use case.
Resolving Dockerfile Naming Issue on Windows
Problem:
When running the following command:
C:\Users\rawat\Documents\8 SEMESTER\Cloud
Computing\Lab\Experiment 2\Codes>docker build -t flask-app .
We may encounter this error:
ERROR: failed to solve: failed to read dockerfile:
open Dockerfile: no such file or directory
This occurs because Windows may have appended .dockerfile as an extension, renaming the file incorrectly.
Solution:
1. Rename Dockerfile.dockerfile to Dockerfile
- Open the folder:
C:\Users\rawat\Documents\8 SEMESTER\Cloud Computing\Lab\Experiment 2\Codes - Rename
Dockerfile.dockerfiletoDockerfile(without any extension).
2. Using Command Prompt:
cd "C:\Users\rawat\Documents\8 SEMESTER\
Cloud Computing\Lab\Experiment 2\Codes"
ren Dockerfile.dockerfile Dockerfile
3. Using PowerShell:
ren Dockerfile.dockerfile Dockerfile
4. Verify the renaming:
Run:
dir
Ensure the output lists Dockerfile and not Dockerfile.dockerfile.
5. Rebuild the Docker Image:
docker build -t flask-app .
Elastic Beanstalk API Error (501) and Alternative Approach
Problem:
Running the following command:
eb init -p docker flask-app --region us-east-1
Results in:
ERROR: ServiceError - API Call unsuccessful. Status code returned 501
This suggests Elastic Beanstalk is not responding correctly or is unavailable.
Alternative Approach: Using AWS CLI and EC2
Since Elastic Beanstalk is failing, we will deploy using AWS CLI and EC2.
Deployment Process
1. Creating a Resource in API Gateway
Command:
aws --endpoint-url=http://localhost:4566 apigateway create-resource \
    --rest-api-id rbx2kdpyxl \
    --parent-id regpu0mm3f \
    --path-part "flaskapp"
Explanation:
-
aws apigateway create-resource→ Creates a new resource in an API Gateway. -
--endpoint-url=http://localhost:4566→ Specifies the LocalStack endpoint, as we are using a local AWS environment. -
--rest-api-id rbx2kdpyxl→ The API Gateway identifier where this resource will be added. -
--parent-id regpu0mm3f→ Specifies the parent resource under which the new resource will be created. -
--path-part "flaskapp"→ Defines the URL path for the new resource (i.e.,/flaskapp).
Output:
| CreateResource |
+-------------+--------------+------------+-----------+
| id          | parentId     | path       | pathPart  |
+-------------+--------------+------------+-----------+
| bsw1umubix  | regpu0mm3f   | /flaskapp  | flaskapp  |
Breakdown of Output:
-
id→ Unique identifier (bsw1umubix) assigned to the newly created resource. -
parentId→ Shows the parent resource ID (regpu0mm3f). -
path→ Displays the full path of the new resource (/flaskapp). -
pathPart→ Represents the last segment of the path (flaskapp).
2. Creating an HTTP Method (GET) for the Resource
Command:
aws --endpoint-url=http://localhost:4566 apigateway put-method \
    --rest-api-id rbx2kdpyxl \
    --resource-id bsw1umubix \
    --http-method GET \
    --authorization-type NONE
Explanation:
-
aws apigateway put-method→ Adds an HTTP method (GET) to a resource in API Gateway. -
--endpoint-url=http://localhost:4566→ Directs the command to the LocalStack environment. -
--rest-api-id rbx2kdpyxl→ Specifies the API Gateway in which to define the method. -
--resource-id bsw1umubix→ Identifies the resource (/flaskapp) to which this method applies. -
--http-method GET→ Defines the HTTP method (GETin this case). -
--authorization-type NONE→ Indicates that no authentication is required for this API method.
Output:
-------------------------------------------------------
|                      PutMethod                      |
+----------------+---------------------+--------------+
| apiKeyRequired |  authorizationType  | httpMethod   |
+----------------+---------------------+--------------+
|  False         |  NONE               |  GET         |
+----------------+---------------------+--------------+
Breakdown of Output:
-
apiKeyRequired→ Indicates whether an API key is needed (Falsemeans no API key is required). -
authorizationType→ Shows the authentication type (NONE, meaning public access is allowed). -
httpMethod→ Displays the HTTP method assigned to the resource (GET).
3. Integrating API Gateway with a Backend Service
Command:
aws --endpoint-url=http://localhost:4566 apigateway put-integration \
    --rest-api-id rbx2kdpyxl \
    --resource-id bsw1umubix \
    --http-method GET \
    --integration-http-method GET \
    --type HTTP_PROXY \
    --uri http://localhost:5000/
Explanation:
-
aws apigateway put-integration→ Configures the integration of API Gateway with an external HTTP backend. -
--endpoint-url=http://localhost:4566→ Uses LocalStack instead of AWS. -
--rest-api-id rbx2kdpyxl→ Identifies the API Gateway. -
--resource-id bsw1umubix→ Links the integration to the/flaskappresource. -
--http-method GET→ Specifies that this integration applies toGETrequests. -
--integration-http-method GET→ Defines the method used to invoke the backend. -
--type HTTP_PROXY→ Specifies a direct proxy integration. -
--uri http://localhost:5000/→ Defines the backend endpoint to which requests should be forwarded.
Output:
---------------------------------------------------
|                 PutIntegration                  |
+----------------------+--------------------------+
|  cacheNamespace      |  bsw1umubix              |
|  connectionType      |  INTERNET                |
|  httpMethod          |  GET                     |
|  passthroughBehavior |  WHEN_NO_MATCH           |
|  timeoutInMillis     |  29000                   |
|  type                |  HTTP_PROXY              |
|  uri                 |  http://localhost:5000/  |
+----------------------+--------------------------+
4. Deploying the API Gateway
Command:
aws --endpoint-url=http://localhost:4566 apigateway create-deployment \
    --rest-api-id rbx2kdpyxl \
    --stage-name prod
Explanation:
-
aws apigateway create-deployment→ Deploys the configured API Gateway. -
--endpoint-url=http://localhost:4566→ Uses LocalStack instead of AWS. -
--rest-api-id rbx2kdpyxl→ Identifies the API Gateway to deploy. -
--stage-name prod→ Creates a deployment under theprodstage.
Output:
--------------------------------
|       CreateDeployment       |
+---------------+--------------+
|  createdDate  |     id       |
+---------------+--------------+
|  1738825514.0 |  fpmrktu41t  |
+---------------+--------------+
Summary
These steps successfully set up an API Gateway resource /flaskapp, linked it to a GET method, integrated it with a backend service, and deployed it under the prod stage using LocalStack.
5. Retrieving API Gateway Stage Information
Command:
aws --endpoint-url=http://localhost:4566 apigateway get-stage \
    --rest-api-id rbx2kdpyxl \
    --stage-name prod
Explanation:
-
aws apigateway get-stage→ Retrieves information about a specific deployment stage in API Gateway. -
--endpoint-url=http://localhost:4566→ Uses LocalStack instead of AWS. -
--rest-api-id rbx2kdpyxl→ Specifies the API Gateway for which the stage details are needed. -
--stage-name prod→ Retrieves details for theprodstage.
Output:
------------------------------------------
|                GetStage                |
+----------------------+-----------------+
|  cacheClusterEnabled |  False          |
|  cacheClusterStatus  |  NOT_AVAILABLE  |
|  deploymentId        |  fpmrktu41t     |
|  description         |                 |
|  stageName           |  prod           |
|  tracingEnabled      |  False          |
+----------------------+-----------------+
Breakdown of Output:
-
cacheClusterEnabled→ Indicates if caching is enabled (Falsemeans caching is not used). -
cacheClusterStatus→ Shows the status of the cache cluster (NOT_AVAILABLEas caching is disabled). -
deploymentId→ ID of the deployed stage (fpmrktu41t). -
description→ Empty field, as no description was provided. -
stageName→ Name of the deployed stage (prod). -
tracingEnabled→ Indicates whether AWS X-Ray tracing is enabled (Falsemeans disabled).
6. Testing the Flask Application
Command:
curl http://localhost:5000/instance-stats
Explanation:
-
curl→ Sends a request to the specified URL. -
http://localhost:5000/instance-stats→ Calls the Flask application endpoint to fetch instance statistics.
Output:
{"Instance ID":"i-6c9d5e3fa4c23d261","Instance Type":"t2.micro","Public IP":"54.214.36.25","Region":"us-east-1","State":"running"}
Breakdown of Output:
-
Instance ID→ Unique identifier of the running EC2 instance. -
Instance Type→ Specifies the EC2 instance type (t2.micro). -
Public IP→ Shows the public IP address assigned to the instance. -
Region→ Displays the AWS region (us-east-1). -
State→ Current state of the instance (running).
7. Retrieving API Gateway Resources
Command:
aws --endpoint-url=http://localhost:4566 apigateway get-resources \
    --rest-api-id rbx2kdpyxl
Explanation:
-
aws apigateway get-resources→ Fetches all resources associated with the specified API Gateway. -
--endpoint-url=http://localhost:4566→ Uses LocalStack instead of AWS. -
--rest-api-id rbx2kdpyxl→ Identifies the API Gateway.
Output:
-----------------------------------------------------------
|                      GetResources                       |
+---------------------------------------------------------+
||                         items                         ||
|+------------------------+------------------------------+|
||  id                    |  regpu0mm3f                  ||
||  parentId              |                              ||
||  path                  |  /                           ||
||  pathPart              |                              ||
|+------------------------+------------------------------+|
||                         items                         ||
|+------------------------+------------------------------+|
||  id                    |  bsw1umubix                  ||
||  parentId              |  regpu0mm3f                  ||
||  path                  |  /flaskapp                   ||
||  pathPart              |  flaskapp                    ||
|+------------------------+------------------------------+|
|||                   resourceMethods                   |||
||+-----------------------------------------------------+||
||||                        GET                        ||||
|||+-----------------------------------+---------------+|||
||||  apiKeyRequired                   |  False        ||||
||||  authorizationType                |  NONE         ||||
||||  httpMethod                       |  GET          ||||
|||+-----------------------------------+---------------+|||
|||||                methodIntegration                |||||
||||+----------------------+--------------------------+|||||
|||||  cacheNamespace      |  bsw1umubix              |||||
|||||  connectionType      |  INTERNET                |||||
|||||  httpMethod          |  GET                     |||||
|||||  passthroughBehavior |  WHEN_NO_MATCH           |||||
|||||  timeoutInMillis     |  29000                   |||||
|||||  type                |  HTTP_PROXY              |||||
|||||  uri                 |  http://localhost:5000/  |||||
||||+----------------------+--------------------------+|||||
Breakdown of Output:
Resources:
- The first resource (
id: regpu0mm3f):- Represents the root (
/) of the API Gateway.
- Represents the root (
- The second resource (
id: bsw1umubix):- Represents the
/flaskappendpoint.
- Represents the
Methods (GET):
-
apiKeyRequired→ No API key required (False). -
authorizationType→ Publicly accessible (NONE). -
httpMethod→ Specifies thatGETis available.
Integration Details:
-
cacheNamespace→ Identifies the cache scope. -
connectionType→ The API Gateway is connected to an external HTTP service (INTERNET). -
httpMethod→ The backend request method isGET. -
passthroughBehavior→ Determines how the request is handled if it doesn’t match a known route (WHEN_NO_MATCH). -
timeoutInMillis→ API request timeout is set to29,000 ms(29 seconds). -
type→ UsesHTTP_PROXY, meaning requests are forwarded to the backend without modifications. -
uri→ The backend service URL (http://localhost:5000/), which points to the Flask app.
8. Creating a Resource for Instance Stats
Command:
aws --endpoint-url=http://localhost:4566 apigateway create-resource \
    --rest-api-id rbx2kdpyxl \
    --parent-id bsw1umubix \
    --path-part "instance-stats"
Explanation:
-
aws apigateway create-resource→ Creates a new resource within an API Gateway. -
--endpoint-url=http://localhost:4566→ Uses LocalStack instead of AWS. -
--rest-api-id rbx2kdpyxl→ Specifies the API Gateway to add the resource. -
--parent-id bsw1umubix→ Identifies/flaskappas the parent resource. -
--path-part "instance-stats"→ Creates a subpath under/flaskapp.
Output:
----------------------------------------------------------------------------
|                              CreateResource                              |
+------------+-------------+----------------------------+------------------+
|     id     |  parentId   |           path             |    pathPart      |
+------------+-------------+----------------------------+------------------+
|  glsyl3hnnj|  bsw1umubix |  /flaskapp/instance-stats  |  instance-stats  |
+------------+-------------+----------------------------+------------------+
Breakdown of Output:
-
id→ Unique identifier for the new resource (glsyl3hnnj). -
parentId→ Shows the parent resource ID (bsw1umubix). -
path→ Displays the full path (/flaskapp/instance-stats). -
pathPart→ Represents the last segment of the path (instance-stats).
9. Adding a GET Method to the Instance Stats Resource
Command:
aws --endpoint-url=http://localhost:4566 apigateway put-method \
    --rest-api-id rbx2kdpyxl \
    --resource-id glsyl3hnnj \
    --http-method GET \
    --authorization-type NONE
Explanation:
-
aws apigateway put-method→ Defines an HTTP method for a resource. -
--endpoint-url=http://localhost:4566→ Uses LocalStack. -
--rest-api-id rbx2kdpyxl→ Identifies the API Gateway. -
--resource-id glsyl3hnnj→ Specifies the/flaskapp/instance-statsresource. -
--http-method GET→ Adds aGETmethod. -
--authorization-type NONE→ No authentication is required.
Output:
-------------------------------------------------------
|                      PutMethod                      |
+----------------+---------------------+--------------+
| apiKeyRequired |  authorizationType  | httpMethod   |
+----------------+---------------------+--------------+
|  False         |  NONE               |  GET         |
+----------------+---------------------+--------------+
Breakdown of Output:
-
apiKeyRequired→ No API key required (False). -
authorizationType→ Publicly accessible (NONE). -
httpMethod→ Specifies thatGETis available.
10. Integrating API Gateway with the Instance Stats Backend
Command:
aws --endpoint-url=http://localhost:4566 apigateway put-integration \
    --rest-api-id rbx2kdpyxl \
    --resource-id glsyl3hnnj \
    --http-method GET \
    --integration-http-method GET \
    --type HTTP_PROXY \
    --uri http://localhost:5000/instance-stats
Explanation:
-
aws apigateway put-integration→ Configures API Gateway to forward requests to a backend service. -
--endpoint-url=http://localhost:4566→ Uses LocalStack. -
--rest-api-id rbx2kdpyxl→ Identifies the API Gateway. -
--resource-id glsyl3hnnj→ Links integration to/flaskapp/instance-stats. -
--http-method GET→ Applies the integration toGETrequests. -
--integration-http-method GET→ UsesGETfor backend requests. -
--type HTTP_PROXY→ Passes requests directly to the backend. -
--uri http://localhost:5000/instance-stats→ Specifies the Flask backend service URL.
Output:
-----------------------------------------------------------------
|                        PutIntegration                         |
+----------------------+----------------------------------------+
|  cacheNamespace      |  glsyl3hnnj                            |
|  connectionType      |  INTERNET                              |
|  httpMethod          |  GET                                   |
|  passthroughBehavior |  WHEN_NO_MATCH                         |
|  timeoutInMillis     |  29000                                 |
|  type                |  HTTP_PROXY                            |
|  uri                 |  http://localhost:5000/instance-stats  |
+----------------------+----------------------------------------+
Breakdown of Output:
-
cacheNamespace→ Identifies the cache for this resource. -
connectionType→ The API Gateway is connected to an external HTTP service (INTERNET). -
httpMethod→ The backend request method isGET. -
passthroughBehavior→ Defines how unmatched requests are handled (WHEN_NO_MATCH). -
timeoutInMillis→ API request timeout is29,000 ms. -
type→ UsesHTTP_PROXY, meaning requests are forwarded without modifications. -
uri→ The backend service URL (http://localhost:5000/instance-stats).
11. Deploying the Updated API Gateway
Command:
aws --endpoint-url=http://localhost:4566 apigateway create-deployment \
    --rest-api-id rbx2kdpyxl \
    --stage-name prod
Explanation:
-
aws apigateway create-deployment→ Deploys the latest changes to API Gateway. -
--endpoint-url=http://localhost:4566→ Uses LocalStack. -
--rest-api-id rbx2kdpyxl→ Identifies the API Gateway. -
--stage-name prod→ Deploys under theprodstage.
Output:
--------------------------------
|       CreateDeployment       |
+---------------+--------------+
|  createdDate  |     id       |
+---------------+--------------+
|  1738826210.0 |  8bku2hvst8  |
+---------------+--------------+
Breakdown of Output:
-
createdDate→ Timestamp of the deployment (1738826210.0). -
id→ Unique identifier for this deployment (8bku2hvst8).
12. Verifying the Integration of Instance Stats API
Command:
aws --endpoint-url=http://localhost:4566 apigateway get-integration \
    --rest-api-id rbx2kdpyxl \
    --resource-id glsyl3hnnj \
    --http-method GET
Explanation:
-
aws apigateway get-integration→ Retrieves integration details for a specific API method. -
--endpoint-url=http://localhost:4566→ Uses LocalStack. -
--rest-api-id rbx2kdpyxl→ Identifies the API Gateway. -
--resource-id glsyl3hnnj→ Specifies the/flaskapp/instance-statsresource. -
--http-method GET→ Retrieves integration details forGET.
Output:
-----------------------------------------------------------------
|                        GetIntegration                         |
+----------------------+----------------------------------------+
|  cacheNamespace      |  glsyl3hnnj                            |
|  connectionType      |  INTERNET                              |
|  httpMethod          |  GET                                   |
|  passthroughBehavior |  WHEN_NO_MATCH                         |
|  timeoutInMillis     |  29000                                 |
|  type                |  HTTP_PROXY                            |
|  uri                 |  http://localhost:5000/instance-stats  |
+----------------------+----------------------------------------+
Breakdown of Output:
- Confirms that API Gateway successfully integrates with the Flask backend at
/instance-stats. - Shows that all
GETrequests will be forwarded tohttp://localhost:5000/instance-stats.
These steps successfully set up an API Gateway endpoint /flaskapp/instance-stats, linked it to a GET method, integrated it with the Flask backend, and deployed it under the prod stage.
 Useful Resources
 LocalStack Documentation
AWS CLI Documentation
LocalStack – A Fully Functional Local Cloud Stack (Medium)
LocalStack: A fully functional local cloud stack | by Ramesh Salve | Medium
What is LocalStack ?
 Want to see the output step by step? Check it out here:
This document walks you through the output of successfully deploying a Flask web application in a full local cloud setup
 And that’s a wrap! Congrats and kudos—you made it through!
  You have successfully completed a full local cloud deployment.
 I hope this guide helped you! If you ran into any challenges, feel free to drop a comment—we’ll debug and troubleshoot together!
Stay tuned for the next article! I’ll walk you through working with Amazon S3 cloud storage. 

 Let me know your thoughts! Did you find this guide helpful? Was the deployment process smooth for you? Drop a like and leave a comment to show some love!

This content originally appeared on DEV Community and was authored by Madhurima Rawat