This content originally appeared on Level Up Coding – Medium and was authored by Kawin Promsopa

Businesses would private networks to store sensitive data. As these networks grow, managing secure and controlled access becomes crucial. You don’t want anyone to access your data. Right? That’s why proper access control comes in. Ensuring only authorized users can get in. One of the most effective tools to secure access to resources is a bastion host.
What is a bastion host?
A bastion host is a dedicated server that lets authorized users access a private network from an external network such as the Internet. Its main purpose is to offer a secure way to access your network, especially for remote connection.
How does a bastion host work?
A bastion host acts like a security guard for your network. When someone tries to access the internal system remotely, the bastion host asks them to verify their identity. It doesn’t decide who gets in — it just enforces the rules. Once authenticated, the user is monitored to ensure everything stays secure.
Why use a bastion host?
The main reason for using a bastion host is to enhance security.
Setting up a bastion host adds a layer of security that controls and monitors access to sensitive data. Only users with authorization can move forward.
When should you use a bastion host?
A bastion host is a great choice when you need secure remote access.
If your team works remotely or you have partners and vendors access to your internal systems. It’s also ideal when you’re dealing with sensitive data, where any unauthorized access could lead to serious security breaches.
Bastion host best practices
- Limit access with IP whitelisting: Only allow specific, trusted IP addresses to access the bastion host.
- Change the default SSH Port: by default, SSH port (22) to a non-standard port can help deter automated attacks and reduce the visibility of the SSH service to potential attackers.
- Use key-based SSH authentication: Enforce key-based SSH authentication to access the bastion host. And enable SSH agent forwarding instead of storing keys on the bastion host.
- Disable password authentication: Turn off password authentication to enhance security and ensure that only key-based access is permitted.
Advantages and Disadvantages of using a bastion host
Advantages:
- Enhanced security: It reduces the attack surface and provides centralized access control.
- Monitoring: It makes it an easier way to keep an eye on who’s accessing your network and what they’re doing.
Disadvantages:
- Single point of failure: Since the bastion host is the only entry point, any issues with it could block access to your network entirely.
- The potential bottleneck for access: If many users are trying to connect at once, the bastion host could become a bottleneck, slowing down access for everyone.
Demonstration
Prerequisites
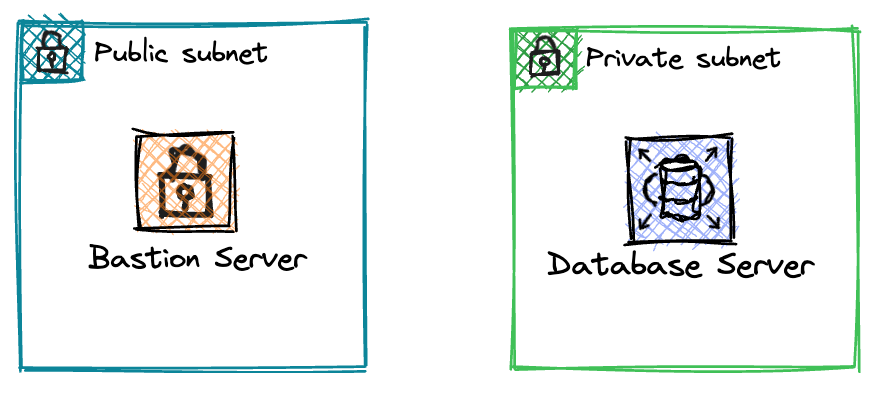
- One server in the public subnet (e.g. Bastion server)
- One server in the private subnet (e.g. Database server)
Step-by-Step Guide:
Step 1: Generate SSH keys (Local machine)
On your local machine (e.g., Macbook), generate SSH Keys with the following command:
ssh-keygen -t rsa -b 4096 -f /Users/$USER/.ssh/id_rsa
This will generate both a private and public key. You’ll see something like this:
-rw------- 1 kawin.p kawin.p 2622 Oct 11 04:00 id_rsa
-rw-r--r-- 1 kawin.p kawin.p  580 Oct 11 04:00 id_rsa.pub
Note: Copy the id_rsa.pub public key as you’ll need it later.
Step 2: Generate SSH keys on the Bastion server
Once connected to the bastion server, generate SSH keys by running:
ssh-keygen -t rsa -b 4096 -f /home/$USER/.ssh/bastion
This will generate both a private and public key. The output should be similar to this:
-rw------- 1 ubuntu ubuntu 3414 Oct 11 04:01 bastion
-rw-r--r-- 1 ubuntu ubuntu  769 Oct 11 04:01 bastion.pub
Note: Copy the bastion private key from the bastion server as you’ll need it later.
Step 3: Add your local public key to the bastion’s authorized keys
On the Bastion server, add the public key from your local machine (generated in Step 1) to the authorized_keys file in the ~/.ssh directory to allow remote access.
If the file doesn’t exist, you can create it. And enter the local machine’s public key.
# local machine (macbook)
ssh-rsa AAAAB3NzaC1yc2EAAAADAQABAAACAQDilKr6/sN+bdjgTBSM0kqJURj9hj03Mj...
Step 4: Add the bastion’s public key to the database server
Next, on the Database server, add the bastion server’s public key (generated in Step 2) to the authorized_keys file in the ~/.ssh directory.
# bastion
ssh-rsa AAAAB3NzaC1yc2EAAAADAQABAAACAQDV/XMFj9GoAVgsOOAC7LBoI9OHikZ4S...
Step 5: On your local machine, add the private SSH key to the SSH agent following:
ssh-add /Users/$USER/.ssh/id_rsa
Step 6: Test the connection to the database server (via Bastion)
ssh -A -i /Users/$USER/.ssh/bastion -o ProxyCommand="ssh -A -W %h:%p <BASTION-SERVER-USER>@<BASTION-SERVER-PUBLIC-IP>" <DATABASE-SERVER-USER>@<DATABASE-SERVER-PRIVATE-IP>
Step 7: Configure SSH for easier access
For more complex setups, it’s best to configure your SSH settings in the ~/.ssh/config file.
Here’s an example configuration:
Host *
TCPKeepAlive yes
ServerAliveInterval 120
ServerAliveCountMax 5

Host bastion-server
  User <BASTION-SERVER-USER>
  ForwardAgent yes
  Hostname <BASTION-SERVER-PUBLIC-IP>
  IdentityFile /Users/$USER/.ssh/id_rsa
  StrictHostKeyChecking no

Host database-server
  User <BASTION-SERVER-USER>
  ForwardAgent yes
  Hostname <BASTION-SERVER-PRIVATE-IP>
  IdentityFile /Users/$USER/.ssh/bastion
  ProxyCommand ssh -q -W %h:%p bastion-server
  StrictHostKeyChecking no
Step 7: Database server connection
After setting up your SSH configuration, you can connect to the database server using a simpler command:
ssh database-server
This will automatically forward your SSH agent through the bastion server and onto the database server, without needing to manually pass private keys every time.
Step 8: SSH Tunel with a bastion host
You can create an SSH tunnel through the bastion server to securely access a service (e.g., PostgreSQL) on the private network.
Use the following command:
ssh -N -L <LOCAL-PORT>:<DATABASE-SERVER-PRIVATE-IP>:<DATABASE-SERVER-PORT> bastion
This creates a tunnel from your local machine (port 5432) to the database server on the private network (port 5432).
Now, open a second terminal window to test the connection. You can use the following command to connect to your database:
export PGPASSWORD='<DATABASE-PASSWORD>'; psql -h localhost -p 5432 -U <DATABASE-USER> -d <DATABASE-NAME>
This command uses the tunnel you’ve set up to connect to the database on the private network, just like it’s running right on your computer.
Conclusion
A bastion host is a powerful way to enhance security in your private network. It acts as a secure checkpoint for remote access, ensuring only authorized users can get in and effectively preventing unauthorized access and potential cyber threats.
If you enjoyed this article, please feel free to leave feedback  , clap
  , comment
  , or follow
  for more weekly insights and best practices!
How to Securely Access Your Private Network from Local Devices was originally published in Level Up Coding on Medium, where people are continuing the conversation by highlighting and responding to this story.
This content originally appeared on Level Up Coding – Medium and was authored by Kawin Promsopa